Hurray! I finally have some cards that I can count over there on the right side of my blog... I managed to get six fairly simple Christmas cards made this weekend. I ordered this gorgeous City Sidewalks paper by Close To My Heart from my niece (it is even prettier than the photos), and wanted to show off the busier prints in the pack. I stuck with some simple Verve sentiments, a few colourful & sparkly snowflakes and some wonderful tree diecuts from the newest CTMH Cricut cartridge, Flower Market:
I am really loving the images on the Flower Market cartridge, so you'll be seeing a lot of those in the future.
Sunday, January 22, 2017
Saturday, January 21, 2017
Inspired By All The Little Things #40
I am the hostess over on the Inspired By All The Little Things challenge blog today, with my talented friend Donna Rudy as my guest designer. Here is the inspiration photo that Donna picked to work with this week:
I was lucky enough to receive the newest Close To My Heart Cricut cartridge 'Flower Market' as a gift from my niece & sister this fall, and knew that there was a chrysanthemum diecut image on it. I wasn't sure exactly how I'd use it, but ended up pulling out some distress inks, and used the negative from the die cut as a stencil. I sponged a soft background, and added the pale pink diecut flower on top. A little machine stitching and a sentiment from Verve finished it off:
Check out what Donna and the design team have to share with us this week over on the Inspired By blog, and be sure to link up your own creation!
I was lucky enough to receive the newest Close To My Heart Cricut cartridge 'Flower Market' as a gift from my niece & sister this fall, and knew that there was a chrysanthemum diecut image on it. I wasn't sure exactly how I'd use it, but ended up pulling out some distress inks, and used the negative from the die cut as a stencil. I sponged a soft background, and added the pale pink diecut flower on top. A little machine stitching and a sentiment from Verve finished it off:
Check out what Donna and the design team have to share with us this week over on the Inspired By blog, and be sure to link up your own creation!
Thursday, January 19, 2017
Spring Colours Challenge & new Art Impressions!
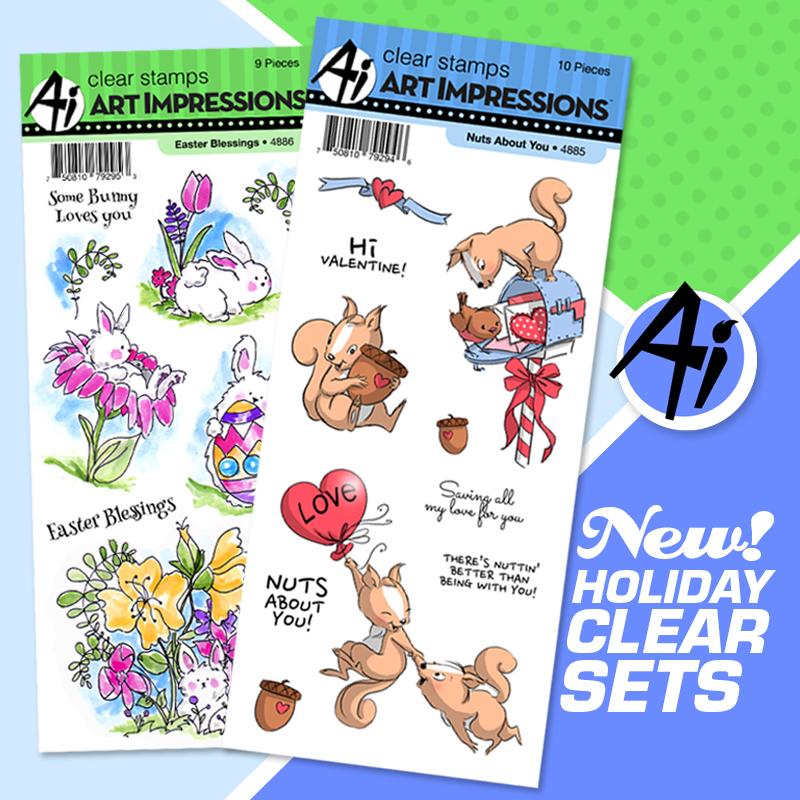
It's my day to do a feature on the Art Impressions blog, and Ai is launching their new 2017 Easter & Valentines sets:
I am so excited to share the brand new Easter Blessings set (Sku #4886) with you today! I've been itching to do a pop-up card for a while now, and this seemed to be the perfect stamp set!
The clouds were really fading into the background, so I added some lime circles behind them which ended up really pulling the colour combo together!
The new challenge on the Ai blog is Spring Fling! We want to see your creations with Spring colours:
Happy stamping!!
Tuesday, January 17, 2017
Fabric Boxes
I'm back with the January edition of Tuesday Threads with Karen on the Art Impressions blog... and this is the most fun that I've had sewing in a while! I came across this idea on Pinterest, and knew that these little fabric boxes would be amazing in the Art Impressions Shop Hop fabrics that are available through Henry Glass Co.
I intended to make just one... and ended up with four! Trust me, if time wasn't an issue, you'd be seeing about a dozen of these. I started with the largest, and just kept making them smaller!
I'm not going to give you a full tutorial, just a bit of info - if you're interested in making some of your own, just do an internet search for "fabric boxes" and there are some very helpful, easy-to-follow tutorials out there. But I've got lots of photos to share (they were just so cute... I kept snapping pictures!)
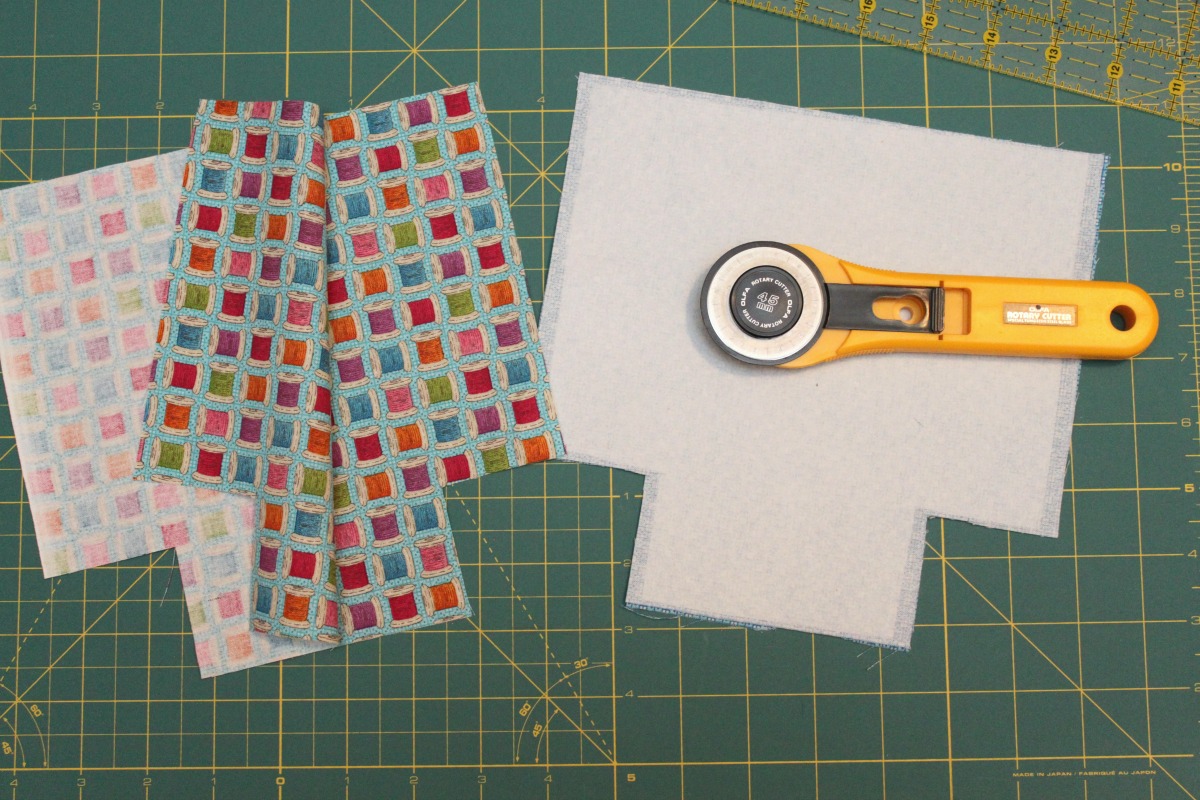
The largest box was made by cutting two 12" squares of fabric, and two of contrasting fabric for the lining. I cut out 3"x 3" squares from the two bottom corners, and then ironed on Therm O Web's medium weight fusible tricot interfacing onto both lining pieces. I sewed down the sides and across the bottom, then mitred the corners to form the box shape - on both the outer and lining pieces. With right sides together, I sewed the top rim of the box to the lining, leaving a 2" opening to turn them inside out, which I then hand sewed shut. Here's what it looks like:
I'll see you next month with another fun Ai fabric project.
Happy sewing!
Thursday, January 12, 2017
Ai Challenge: Card Resolutions
It's that time of year when we start setting goals... and while I don't do too many personal resolutions, I always making "Crafting Resolutions". Things I want to try, or try to get better at, or maybe just to craft more often. This year my resolution is to learn Brush Lettering! I see amazing things done by a lot of stamp artists, and have started a Pinterest board with Lettering tips & styles. I literally started YESTERDAY, watching a few youtube videos, and reading a few blog posts to get going... and after about three pages of practice lettering. Here is my first effort:
I knew that this was the card that I wanted to make for this week's Art Impressions challenge (which is Card Resolutions!) so I focused on the word love in particular, and managed to get this one that I was fairly happy with! I used a pink Tombow marker, then went over the bottom portion with a slightly darker pink Copic marker to "attempt" a bit of an ombre effect. I also went over the dark pink areas with a pink Wink of Stella marker so that there is a bit of shimmer that doesn't show in the photo. I stamped Art Impressions Boy Cupid Set (Sku #4219) and coloured him with Copics before fussy cutting and popping him up on pop dots. The die cut heart is popped up as well. So stay tuned to see if I stick with my resolution and keep up with some lettering this year. We would love to have you link up your card resolution to our challenge over on the Ai blog. Happy crafting!
Labels:
Art Impressions,
Boy Cupid Set,
Brush Lettering,
Copic Markers,
Karen Day,
Tombow,
Valentine
Tuesday, January 10, 2017
Wooden Gate Watercolour
I'm starting my 2017 Art Impressions posts with some watercolours! For the last couple of years, my New Year's Crafting resolution has been to watercolour more - and I've actually stuck to it! I own quite a few of the Ai Watercolour sets, and really love pulling them out and painting all afternoon... Here are a couple of creations that I made using one of the Watercolor Minis: Wooden Gate (Sku # 4762):
Saturday, January 7, 2017
Happy New Year!
A little belated, I know! I never intended to take a three week blog break! I've actually been creating like crazy for CHA (so nothing that I can post yet!) so between getting those projects shipped off, hosting a couple of times over the holidays, and holding down the fort at work, it meant that things were a little quiet around my blog. I wanted to share a couple of Watercolour Minis that are older Ai sets that I was working on. Here is Old Barn Mini Set (Sku #4807):
And Blooming Birdhouse (Sku #4603)
Both are using a combo of Tombo & Marvy markers.
And Blooming Birdhouse (Sku #4603)
Both are using a combo of Tombo & Marvy markers.
Subscribe to:
Posts (Atom)