Wednesday, January 31, 2024

Cosmos Background

 I have loved using my Betterpress Machine, and several weeks ago, took a class with Spellbinders to learn a bit more about it.  The add-on kit for the class came with this GORGEOUS plate called Cosmos Background.  So easy to do, I've used the Betterpress Black ink, and both of these are just done using regular cardstock (you only get the lovely embossed effect when you use a thicker, softer cardstock).

Not exactly sure why I picked this next colour, it's sort-of a greenish taupe shade, not too different from kraft - but I ended up really loving the end result.
I used Pinkfresh Studio inks with the stencils that came in the kit to colour them up, then added Betterpress sentiments from the kit as well.
I added a few black jewels for some extra sparkle, and mailed off the one on the left to my niece for her birthday.  Happy Birthday, Allie!

Tuesday, January 30, 2024

Birthday Wreath

 This is a remake of a card I made last year.  At the time, I die cut enough of the rainbow boughs for two cards, so am finally assembling the second one!

This is actually a set of pine needle dies, but they have a bit of a direction to them, so I knew they'd assemble nicely into a wreath shape.  Background die is Taylored Expressions, and the sentiment is Perfect Sentiments from Pinkfresh Studio.

I'm on a mission to finish up partial projects that are kicking around my craft room, so I'm happy to have this one done and off my desk!


Friday, January 26, 2024

Daisy card

 I have an all-Spellbinders card today!  I've really been enjoying their products lately.  This is the Floral Stems die set by Simon Hurley, along with the Essential Arches die.

The wax seal was one I created during the Pressed Posies class given by Spellbinders a few weeks ago, so i adhered it down over some gold twine that I wrapped around my panel before attaching it with 3D foam tape to my card base.  I added a little ink blending in Tattered Rose and Worn Lipstick, and some gold paint spatters as well.


Sunday, January 21, 2024

Floral Stems

 I couldn't wait to create with my new Essential Arches dies from Spellbinders!  I've also been wanting to try painting some of my die cuts, after cutting them out of watercolour paper.  This is my first effort - lots of practise still needed, but I decided to make it up into a card.  I used my Gansai Tambei watercolours, trying to keep my style loose, adding a few different colours.  I spattered everthing with blue paint before assembling it all together.

The pieces are all from the Floral Stems set by Simon Hurley, all but the bow from The Greetery.  I added one of my Betterpress sentiments from You Are Everything sentiments from Spellbinders.


Tuesday, January 16, 2024

Lots of Love

 I'm starting to assemble a few Valentines, once again using things I've got sitting in my stash.  I stamped a bunch of these Oopsie Daisy flowers from The Greetery several years ago (!!), and am finally using up the last few.  I've also pulled out a Greetery stencil to do some background ink blending with Worn Lipstick and Tattered Rose Distress Oxide inks, and finished them off with a diecut sentiment and jewels from Pinkfresh Studio.


You're Clawsome

This is one of those stamp sets that I coveted the first time I saw it.  I resisted for a year or two, and then finally bought it.  It's not something I'm really going to use a lot... but I think as a kid, we all wanted to play the claw vending machine to try to win something awesome.  And while I've coloured and used it in the past, I'd never made it into an interactive card until today.

I stamped everything onto some cream cardstock and coloured them in with Copic markers before fussy cutting it all out.  I got onto the Lawn Fawn website, and looked up "You're Clawsome", and they have a video showing how to put together the claw slider using a penny and foam dots.  As long as you remember to do everything in the right order, it's actually pretty easy to assemble!

So when you tilt the card side to side, the claw slides back and forth with the little unicorn clasped in it.  I added a little Wink of Stella to the unicorn's horn and on a few other spots to give it some glimmer.  I can't believe that I got two of these made.  Happy to be using papers and stamps that I've had on hand for a while.

Paper and stamps are all Lawn Fawn.

Saturday, January 13, 2024

Pressed Posies Class

 I had a great time last night participating in the Pressed Posies class from Spellbinders.  I've only used my new Betterpress machine a couple of times, so was keen to get some good tips, and I am loving what we got in our kits.  Here are the three cards we created:


All supplies are Spellbinders, other than Distress Oxide inks that I used for ink blending and some of the pressed images.  Thanks to the Papercrafter's Workshop for offering the class!


Friday, January 12, 2024

Ai Monthly Challenge

Did you know that Art Impressions has started a monthly challenge on the Ai blog?  They're going to be a little different each month, but January's is a colour challenge!  It's a lovely pastel-ly feeling colour palette (scroll down to see the inspiration photo), so I pulled out four of my Tombow markers and created a quick scene.

Using #N57, I coloured up one of the cats from 4873 - WC Cats Set, and stamped it onto my Canson XL Watercolour Paper.  I masked the kitty, and stamped the plant stand from 5568 - Rocker & Plant Stand Set, also coloured in N57.  I pulled out all the colour with a damp brush, then created my bouquets - using the circle of flowers from 4868 - WC Flower Set 2 in #673, the dot flowers from 5009 - WC Mini Flower Set in #761, and the small foliage in #312.  I wanted a little height in the top bouquet, so added the grasses from 5126 - WC Foliage Set 4 in #312.  I painted in the kitty & stand by picking up N57 from my palette, and used #491 for the pots.  A wash of #493 was painted in the background, and I used #565 to add shading in and around all of my images.

I die cut the scene with my Oval Hemstitched die from Spellbinders, and adhered it to my base with some 3D foam tape, and matted it with a pale grey.  A pink organdy bow finished it off.  Hope you'll have time to play along, there are always great prizes to be won!


Tuesday, January 9, 2024

Reflections

It's my husband's birthday tomorrow, so I pulled out this panel I created a while ago using the Reflections stamp set from The Greetery that my niece let me borrow.  I added a little ink blending to the sky, and a sentiment from Pigment Craft Co.  "Have a Lovely Day" isn't the usual sentiment I'd give my hubby, but since our last name is Day... I usually try to work it in there somehow.


Sunday, January 7, 2024

Hummingbird card

 Here is the 6th bird card that I created, fully intending it to be part of the card set in my previous post... however this one seemed to have a life of it's own.  No matter what I tried to try and make it blend in with the other, quieter styled cards, this one kept screaming for bright papers (obviously due to the way I coloured it!).  So here is the sweet hummingbird image, standing all by itself!


Bird Card Set

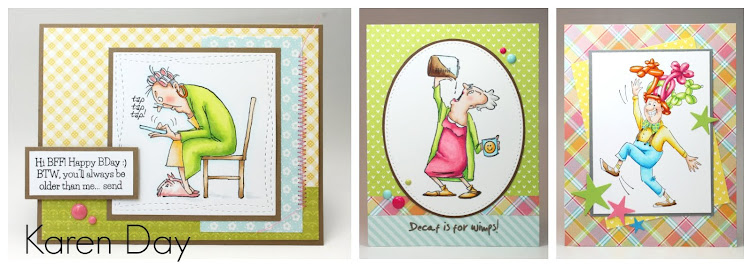
I am kicking off the Art Impressions Watercolour Weekend posts for 2024 with a set of five cards.  I have a brother-in-law who is a 'birder', so when Ai first came out with all of the bird freebie stamps, I knew what I'd be doing with them!  He's also a big fan of my cards, so here's what I've made for him (scroll down to see them individually):

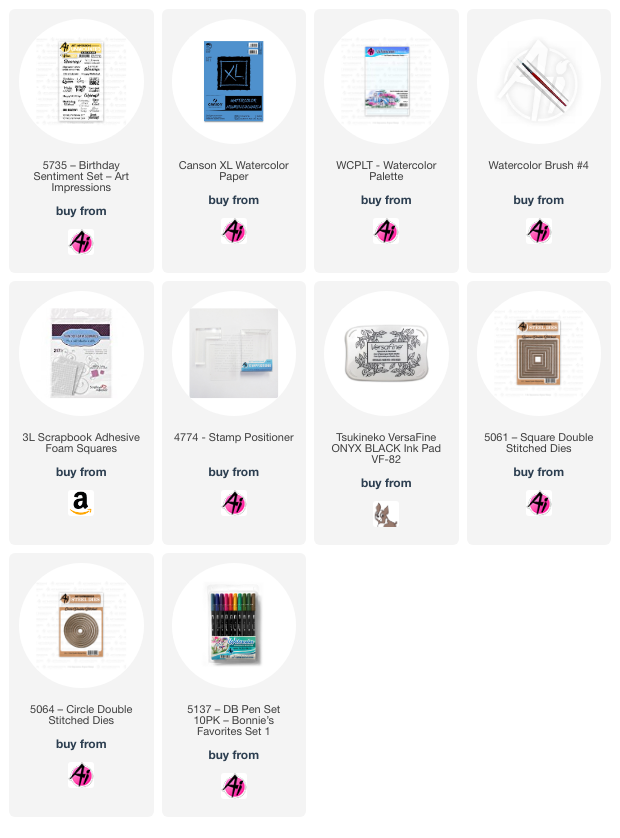
I started by die cutting my Canson XL Watercolour paper using the 5061 - Square Double Stitched Dies, and the 5064 - Circle Double Stitched Dies, keeping in mind that some of the birds are larger than others, and I wanted a variety of shapes to keep the set interesting.  All of the birds were coloured with Tombow Dual Brush markers in #969/565, and then filled in with various other colours.  *In order to colour them up accurately, I Googled each bird so that I would have a photo to follow!  For each one, I added a little greenery/foliage - several using stamps, and some were hand drawn (the chickadee's leaves).  I kept everything really simple, as I wanted to keep the focus on the birds - so I used a wash of #565 on each, to suggest the sky.

When assembling them into cards, I matted each image with a darker colour to frame it, then chose some subtly patterned papers from my stash as my card bases.  Since they're all for a fella to hand out to friends and family, the card designs were fairly plain, without a lot of extras.  I stamped sentiments from 5735 - Birthday Sentiments Set onto the Canson paper, or right onto the backgrounds using Versafine Onyx Black ink.


*Don't forget that the Watercolour Design Team will be sharing projects on the Ai blog and other social media every Sunday, all year long!  We look forward to bringing you new inspiration each week.

Thursday, January 4, 2024

Valentines for Veterans

This is such a wonderful initiative by Veterans Affairs Canada - where you are encouraged to create handmade cards, and write a note inside to thank a veteran for their service - or simply wish them a Happy Valentine's Day.  It's open to everyone, and children/schools are welcome to participate - just google "Valentines for Veterans" and it will lead you to the Gov't of Canada website with the address to send your cards.  They need to be received by Feb 1st, in order to be distributed to the care homes on time.  *Also - I believe there is an American version of this, so Google it if you're from the US!

I primarily did two styles, and was able to get 37 cards made up this year.  It's my second time participating!  These are ancient papers from Close To My Heart that I've had in my stash forever, and I am so happy to use them for a good cause.  The heart dies and sentiment are CTMH also.


LinkWithin

Related Posts with Thumbnails