

Sunday, February 27, 2022
More of Anita Jeram
I have another card made using the Conga Line stamp set from Colorado Craft Co. designed by Anita Jeram. I posted one a few weeks ago that I painted with watercolours, and wanted to give it a try with my Copic markers - so here is my Copic version: Such a great image! And it works well as a slimline card. I made sure to use fairly neutral colours so it can be a masculine or feminine card... and, I managed to get two of them made!
Tuesday, February 22, 2022
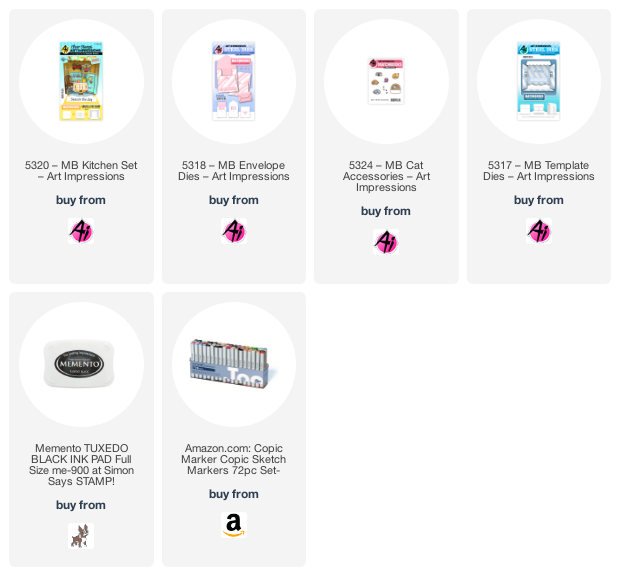
Ai Matchbooks
Have you tried the Art Impressions Matchbooks, yet? Everything 'mini' is big right now, and these are quick and easy to assemble. Here is 5320 - Kitchen Set:


You open the flap to see a little folded card inside!

The 5317 - MB Template Die is the base of the card, and works best in double sided paper:

Just open the flap, and the tiny card unfolds.


A close up of those adorable windows!

There are all kinds of Matchbooks to choose from, you can find them on the Ai website here!

Thursday, February 17, 2022
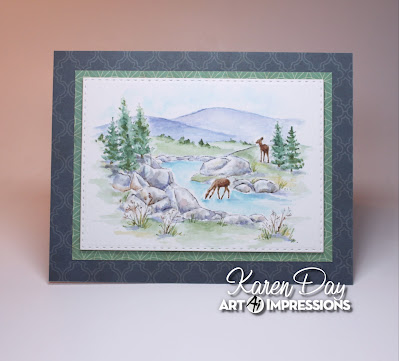
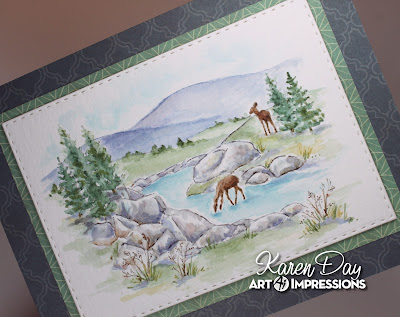
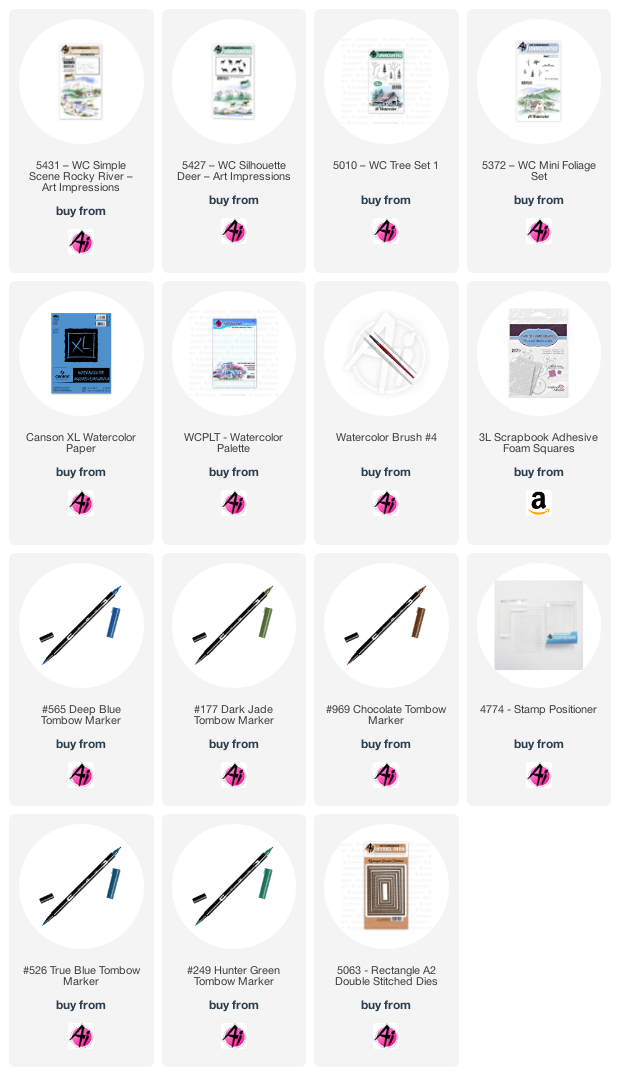
Ai Simple Scene
I will be sharing this on the Art Impressions blog this Saturday for the 2nd February Watercolour Weekend. Time for another scene today, using the 5431 - WC Simple Scene Rocky River:

Monday, February 14, 2022
Pinkfresh Studio Butterflies
I am in love with my newest Pinkfresh Studio stamp set: Butterflies! I used the matching stencils to add colour with my mini ink cubes, and fussy cut the butterflies out. The Diagonal Stitched Plaid die was used on white cardstock for my background, and then I ink blended some Slumber ink onto white cardstock, and cut out my hearts and the stitched frame.


Sunday, February 13, 2022
Hot Chocolate Bombs!
Well this was hilarious, fun and very messy! Hot chocolate bombs became all the rage about a year ago... so when we saw a kit with the molds on sale for $8, my daughter & I thought, why not? So we learned a few things. Those Youtube videos that look effortless when people put them together aren't exactly the reality! But definitely listen to what they say regarding ingredients and how to temper chocolate. We didn't want to buy expensive chocolate to start, so grabbed what we could find to give it a try. I would definitely not use milk chocolate next time! Even though it contained cocoa butter, as they said - it was melting as soon as we touched the chilled cups, so I think that dark chocolate would be the way to go. Here's what our efforts produced:
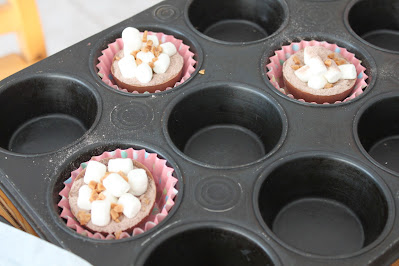
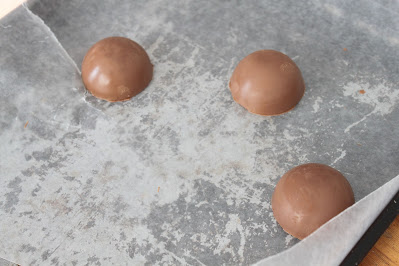
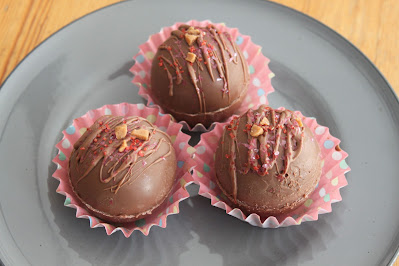
Finished efforts! We haven't sampled them yet - but you add about 1 cup of hot, steaming milk to a mug, then you drop the bomb into it, and it should melt/explode.
Friday, February 11, 2022
Deepest Sympathy
They are the hardest cards to make, but we all need them from time to time. I made up a couple of sympathy cards for coworkers this week. I kept it simple, and used this beautiful paper from One Canoe Two, and a sentiment & die cuts from Verve.


Tuesday, February 8, 2022
Pamper Your-Shelf
I am doing a guest post on the Art Impressions blog today! I am a long-time Try-fold fan, and the mini ones are especially fun to do. I work in a library, so made this for a coworker! Here is 4853 - Pamper Your-Shelf MTF:


There are two small dies in the set that are easy to fit over the stamped images, and they create the little windows that allow you to see through the flaps to the cute little mouse image on the inside of the card.

Since Copic markers can either bleed or show through to the back side of your cardstock, I cut out pieces of patterned paper to fit the inside of each flap, using the die to cut through that layer as well. It makes for a prettier card, and gives a clean, finished look to your project. There are two sentiments in the set, so I matted one for the inside of my card. I adhered a piece of ribbon to the back side of the try-folded cream panel before attaching it to my single background sheet, so that when the card is folded up, I can tie a neat bow to hold it together. The finished card size is just under 5" square. You can find all the Mini Try-Folds on the Ai website here!

Saturday, February 5, 2022
Valentine Hedgehogs
I made a couple of sweet "Galentines" today for a couple of friends. These little Hedgehogs from Lawn Fawn are favourites of mine!


The hedgies are coloured with Copic markers and adhered with 3D foam adhesive, along with the sentiment.

My Pinkfresh gems added a little sparkle to finish things off.
Thursday, February 3, 2022
A Formal Bouquet
It's the Watercolour Weekend this Saturday on the Art Impressions blog. I created a formal bouquet today, as I wanted to showcase some of the wonderful new flower & foliage sets, and used the limited edition Column stamp to give my bouquet some height:
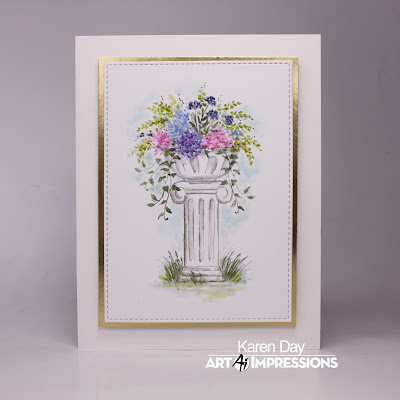
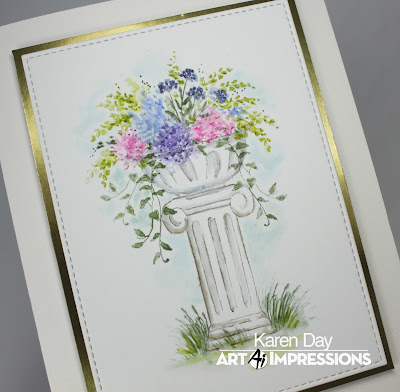
Don't forget to check out what Dot & Tricia have to share on the blog this Saturday!


Subscribe to:
Posts (Atom)