Sunday, February 28, 2021

Festive Penguin

 More of my efforts to use up images that I had stamped previously, along with patterned paper from Carta Bella that I'm finishing up.  This little penguin and the trees (love these!) were from High Hopes Rubber Stamps:


I managed to get 8 of them made!  I used the 2-step Snowflake dies from Photoplay, with Speckled Egg and Broken China Distress Oxide inks, and I love the background effect it created.


Saturday, February 27, 2021

A little more Christmas

 Yes, I'm still making Christmas cards whenever I can.  This was part of my pandemic colouring blitz when we were first in lockdown last spring - a High Hopes image I'd had stamped years ago - so I spent my evenings colouring with my Copics.

Then last fall I had a fun afternoon of ink blending a bunch of different combos, and this was one of them (Peacock Feathers & Blueprint Sketch)... afterwards I saw the image and background together, and knew they'd be a perfect pair.  I matted the image with some red mirrored cardstock, added a sentiment from Verve and a few red sparkles.


Thursday, February 25, 2021

Pink Christmas part 2...

 I have the other 3 styles of Christmas cards to share, that I made using Merry & Bright papers from Carta Bella.  Love these papers!

Sentiment is from Verve, decorative rectangle die is from The Greetery.
Word die is Echo Park.
And here's the whole group, one more time!

Wednesday, February 24, 2021

Pink Christmas

 It's Pink Shirt Day!  So what's a crafter to do, but post a pink card or two?  I am on a mission to use up supplies that have been in my craft room for awhile, and managed to create 8 Christmas cards using the Merry & Bright papers from Carta Bella. 

I also made a point of using some of the STICKERS that came with this paper pack - something I never do, but they're wonderful stickers, and make great accents.  I added a few die cuts and kept the colours bright and fun.
I'm also loving all of the Nuvo Drops that Santa put in my stocking this year - those little green dots are one of my new colours!  I'm going to split up my cards into a few posts, but here's the group of them together:

Thursday, February 18, 2021

Save the Date!

 I've pulled out a few older and a few newer stamps to create a Save the Date card for this week's Watercolor Weekend on the Art Impressions blog:

I began by inking up the smallest church from the 5058 - WC Church Set in my Tombow Dual Brush Marker #565 Deep Blue, and then went over it with #969 Chocolate before stamping it onto my Canson XL Watercolor Paper.  I covered it with a mask, and then coloured up 5376 - WC Basic Scene in two colours - the road in #969, and the hills in #177 Dark Olive.  Because this stamp is clear, I was able to easily stamp it and position it perfectly to have the church perched on one of the hills.  To the foreground, I added the smallest tree from 5373 - WC Lg Tree Set, colouring only 1/2 of it in #969 chocolate.  I placed a small tree from 5372 WC Mini Foliage beside the church, and added the shrubbery to the hillside with #177.  The scribbled foliage was used on both trees - I stamped one layer that I then added water to soften and paint out the detail, and then I stamped a second layer to created darker foliage with more detail.  A damp brush was used to pull of the colour of the road and tree trunks and to add colour to the hills.  
I picked up #N45 Cool Grey 10 from my palette and added several layers of colour to the roof and steeple of the church, being sure to leave a few highlights and darken shadowed areas.  I used #565 to add shading to the door and windows, and painted the suggestion of a walkway and the sky.  For my flowers, I used the tiny dot flowers from 5074 - Bible Flower Set in #993 Chrome Orange, and the small greenery sprig from the set in #177 added the foliage.  The single stems are from 4868 - WC Flower Set 2 in #565/177, and the tiny grass from the Mini Foliage set finished my scene off.
To add a little definition to the church windows, I used my Twintone 42 Navy marker, and then used it's fine point to add some dots around my flowers.  The 5063 - A2 Double Stitched Rectangle dies cut out my scene, grey mat and sentiment (which is from the Floral Invites set!)


Monday, February 15, 2021

More Hexagons

I posted a card a few weeks ago with a hexagon background, and using the same patterned papers and my hexagon dies, I've put together a few more generic cards to keep in my stash:

I used three different sizes of hexagons, and randomly arranged them in different patterns.  I used my Lawn Fawn 'thanks' die and my Avery Elle 'hello' die in black cardstock for my sentiments.
On these two, a few of the smaller hexagons are popped up with 3d foam dots, and I added some black Nuvo Drops on all of them.


Tuesday, February 9, 2021

The Last Valentine

 Well here I am with 5 days to go... and I'm finished my Valentines??!  If only I could finish all of my Christmas cards early and ahead of schedule!  I saw this idea by Michelle on the MFT Instagram page, and recreated it with a couple of CTMH dies that I had in my craft room:

I used a heart die to create my own stencil, then from the bottom up, used Cracked Pistachio, Mermaid Lagoon, Peacock Feathers and Faded Jeans with blending brushes to fill it in.  I sprinkled it with a bit of water, then some indigo ink.
I taped down both the stitched rectangle die and the love word die, and ran them both through my Cuttlebug.  I cut love out 3 more times in white cardstock that I stacked underneath the original to give it a bit of height.  I matted it all on a piece of teal green cardstock and mounted it onto my white card base. 
This will be for my hubby :o)


Friday, February 5, 2021

Valentines

 Getting some Valentines made for my children.  I usually do cute & fun ones for them, but this year I went more classy & dreamy!  I was inspired by the sketch on the Fusion Card Challenge blog (so happy to be playing along - it's been a while!).

This first one is my favourite - love this mix of colours.
Both patterned papers are from Pink Paislee (happy sigh...)
On both cards, I layered the word die with several layers of cardstock to make it a bit more substantial, and the hint of a shadow makes it stand out a little better against my busy backgrounds.
Here was our inspiration:


Photoplay Masculine cards

 I've pulled out my Photoplay Say it with Stamps set again... this time to make a few masculine cards.  This is the best set of products I've owned (ever?) to make masculine cards - all I have to do is pick the right papers, choose one of many sentiments, and it comes together really quickly:

Every guy I've given a card to that says "You are a bad ass" has smiled.  It's a win!


Papers are Rustic by Authentique.  You can find the Say it With Stamps line at the Papercrafter's Workshop:


Thursday, February 4, 2021

A Watercolour Valentine

For the upcoming Watercolour Weekend on the Art Impressions blog, I'm sharing a quick Valentine idea using the wonderful 5072 Block Letters Die Set and a little watercolor wreath to spell out "I (heart) you"! 

I actually started out by creating my ink blended background panel, which established my colour palette - Distress Oxide Ink colours are listed below! 

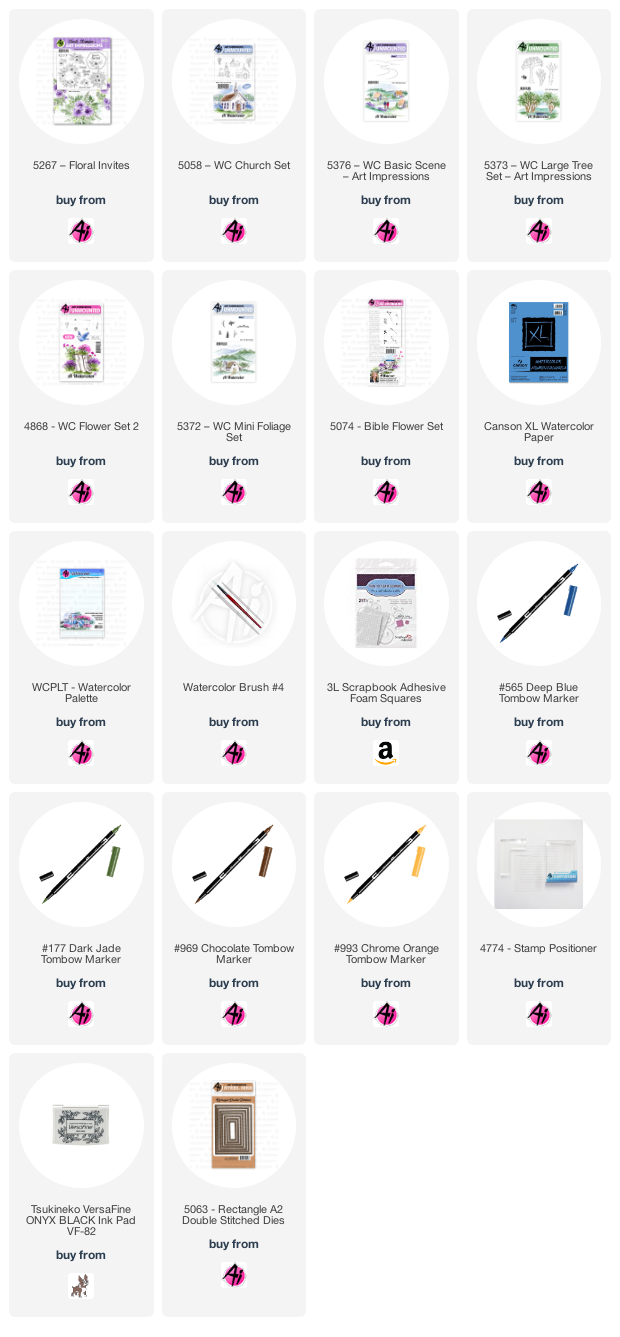
I chose similar colours of Tombow Dual Brush Markers, and started making my focal panel by sketching a heart shape on my Canson XL Watercolor paper.  I stamped little clusters of flowers and greenery using the following: From 5074 - Bible Flower Set, the Daisy cluster in #606 Violet; the tiny dot flowers in #565 Deep Blue; and the Tiny greenery in #177 Dark Jade and from 4868 - WC Flower Set 2, I used the little heart flowers in #743 Hot Pink. I touched everything with a damp brush - but kept the images fairly intact without spreading the ink around.  I lined up the I and U from the die set, and ran it through my machine to cut out the letters.  

I took both of my panels and cut them out with the 5063 - A2 Rectangle Double Stitched Dies which finished the edges nicely.  Both panels were mounted onto a matte silver cardstock, and I had to cut the middle of it out under the letters to have the background show through.  I tied some blue organdy ribbon around my base, and added a bow before adhering my image down with 3D adhesive tape.  A few sequins finished it off.


LinkWithin

Related Posts with Thumbnails