Showing posts with label Wedding card. Show all posts

Monday, April 7, 2025

Folk Floral Stem Wedding Card

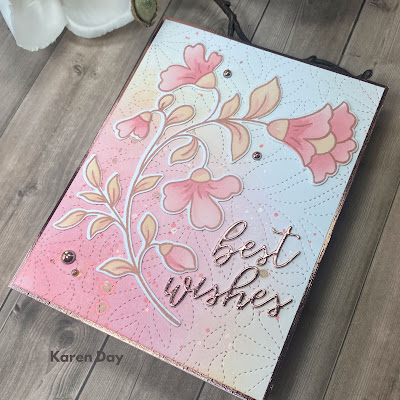
I am in need of a wedding card, so I pulled out the Folk Floral Stem set from Pinkfresh Studio.

I stamped the image in Lisa Horton Crafts Copper Pot ink (lovely metallic shimmer!), then used the coordinating stencil to shade it in using 3 Pinkfresh Studio ink colours.  It was cut out with the coordinating die, and layered with another white die cut to give it some extra stability.

For the background, I ink blended the same three colours onto some white cardstock, then ran it through my die cut machine with the Dotted Tile Debossing Cover Plate from Altenew - which gives it the pierced design.  I spattered it with some Frayed Burlap Distress Spray and some of the matching inks.  To complement the warm colours, I mounted it onto a panel of rose gold metallic cardstock, that also shows through the tiny perforations on the panel.  I used the same cardstock to cut out the Scripty Sentiment dies from Spellbinders, and added two layers of cardstock to bulk them up a bit.

After adhering everything, I added a few champagne pearls from Pinkfresh Studio to finish it off. 

Thursday, October 24, 2024

Wedding Card

I hadn't posted this card that I made for a beautiful family wedding we attended in September.  It's a take on a card we made in a Spellbinders class last January.

The base is a Bisque Cotton Card Panel, inked with Distress Oxide inks, and pressed with the Sealed Florals and Faux Seal Sentiments Betterpress Plates.  I used the Spellbinders Treasured Gold Brushed cardstock.
A little spattered gold ink and some strands of gold tinsel finished it off.


Saturday, April 20, 2024

Bridal Buttercup card

My daughter was in need of a wedding card, and I had just been playing with the beautiful Fresh Picked Buttercups die from Spellbinders, when I had the idea that it would look stunning in all-white.  The set did not disappoint!  I cut the entire die out of Neenah Solar White 80lb cardstock, and glued it onto my 110lb base.

Since the bridesmaids are wearing pink, I decided to add just a hint of Spun Sugar Distress Oxide ink to the flower centers and buds, and then for a little glimmer, the centers were coated with clear Wink of Stella.

The sentiment is from Pinkfresh Studio's Perfect Sentiments, embossed in gold, and stacked with 3 layers to give it a little dimension.  When I attached the flowers, I only added glue to the centers, and bent the petals upwards which gives the card a lovely delicate look.

Congrats Nik & Naza!

Tuesday, May 12, 2020

Greenery Invites - You're Invited

Sharing my second card today using Greenery Invites - again using my Minc machine to add gold foiling to the font and corner images:
 It's so hard to photograph glimmer!  But I think you can see in the first photo how pretty and shimmery this is in real life.  After die cutting my sentiment with a stitched square die, I mounted it on navy and then a larger square of shimmery blush cardstock.  The corner images were fussy cut and mounted with foam tape.  You can find the Greenery Invites set on the Art Impressions website, here.

Friday, May 8, 2020

Last Floral Invite Card (for now!)

Here's the 3rd card I made with the Floral Invites set from Art Impressions - I'll show the trio of coordinating cards first, and then scroll down to see the little Thank You card on it's own.
 Making cards that coordinate, just makes me happy!
I'm pretty sure that this was 4 1/4" square (I've long since sent it on to Ai!).  Thank you cards are often a little smaller than regular cards, so I just focused on die cutting the sentiment with my hexagon stitched dies, and added one of the little sprigs coloured in Copic markers.  The background has a soft blending of Distress Oxide ink, and then was spattered with a little deep blue ink.


Thursday, May 7, 2020

Another Floral Invite card

Here's the second card I made using Art Impressions new Floral Invites - I had fun doing a little ink blending for the background:
The flowers are coloured with Copic markers, then fussy cut and adhered with foam dots over the geometric outline & sentiment.

Thursday, May 16, 2019

Wedding Ideas for Watercolor Weekend

April showers bring May showers where I'm from!  But I am all about May flowers today, and have a trio of free-form wedding ideas to share for my Art Impressions Watercolor Weekend post.
I've had the idea for the dress card floating around in my head for awhile, ever since I created my "Love" card a few months ago (scroll down to the end of my post, and you'll see my first effort in this style of stamping).  I wanted to use the Ai floral & foliage stamps to create a sort of life-like embroidery look, and kept going to create a grouping of wedding themed items.
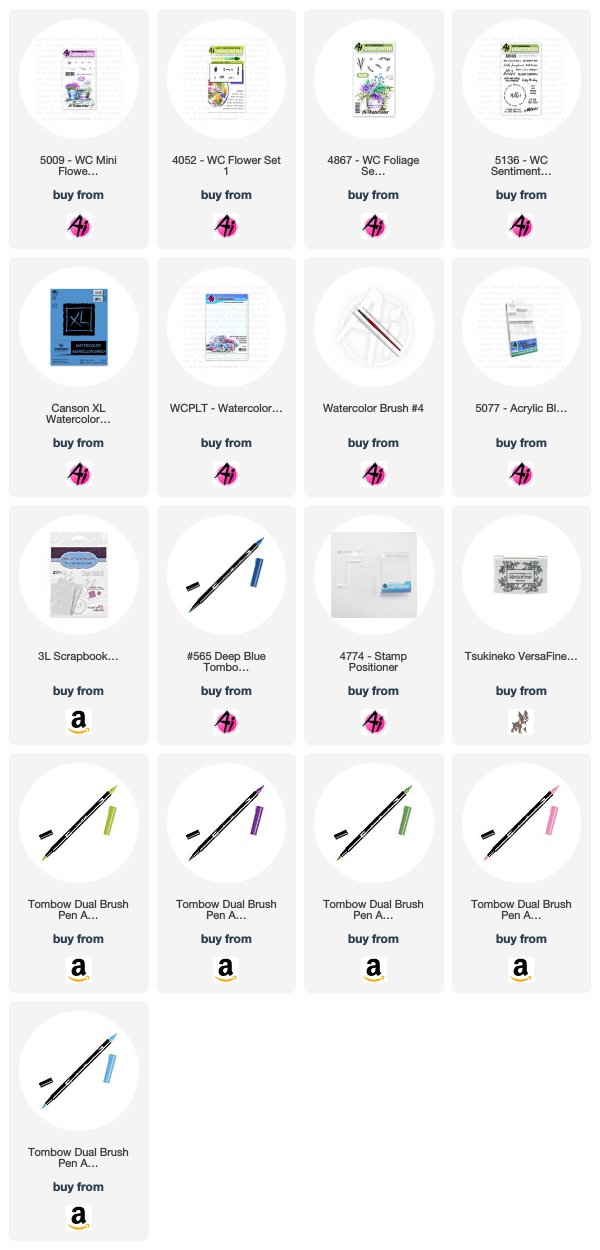
 I sketched the outline of my dress in pencil, directly onto my watercolor paper, and indicated where I wanted the higher points around the hemline to be.  Using the Daisy Bunch in Flower Set 4052 and my #703 Pink Rose marker I stamped it three times without reinking, multiple times around the hem, and again on the neckline.  I repeated this with the tiny cluster from 5009 WC Mini Flower Set and #676 Royal Purple.  For my last flower, I used the Mini Foxglove from Flower Set 4052 and #533 Peacock Blue, stamping it three times in a row to create the flower stalk.
With my #126 Light Olive marker, I coloured just the tip of both of the trailing ivy stamps in 4876 WC Foliage Set 2 New to fill in the greenery, making sure to change directions to keep it looking random.  I used my damp #4 paintbrush to dab at each of the flowers & foliage to soften each image and enliven the colours.  It became apparent where the holes were on my 'embroidery', so I used the small green from 4876 WC Foliage Set 2 and #158 Dark Olive to fill in those white spaces.  I left these as is, not using my paintbrush, as it defined the shape of the foliage a bit more.  I traced the pencil outline of the dress with #533, and used this colour with my brush to add some shading.  I picked up #565 Deep Blue from my palette and painted a background wash around the dress.  Finally, I went in with all of the markers directly onto the image to add in a few deeper colours.  The sentiment is from WC Sentiment Set 2, stamped in Versafine Onyx Black.  I used my sewing machine to stitch the panel to some coordinating cardstock and adhered it to my base with pop dots, then glued on some irridescent sequins.
The colours and stamps are all the same for my other two projects.  For this card, I sketched in the cake and the table, just adding foliage to each layer.  I sketched in a heart as my cake topper, and painted in a few ripples on the tablecloth.  I stamped this sentiment separately, matting and stitching around it, and adhered it with pop dots going off the right edge.
As a fun little add on, I painted a bouquet and drew in a ribbon bow underneath it to use as a placecard:
Once you own a few of the basic flower & foliage sets (or really just one of each!) you have everything you need to create your own projects like these.  Head on over to the Ai blog this Saturday to see what the rest of the Watercolor Guest Design Team have to share.
Here was my first cluster-stamped project:

Thursday, August 10, 2017

Showered With Love Challenge

The current challenge on the Ai blog is "Showered With Love" - we want to see your Shower cards, either Baby or Wedding.  I went with wedding, as I've had this bouquet idea using the Art Impressions Watercolor stamps for a while:
 Typically, the Ai florals are used with a pot or container of some kind, but I thought they would make a great wedding bouquet (although this would make a great birthday or thank you card, too!)  I stamped my flowers in shades of pink and purpley-blue, tucked in some greenery, then hand drew in the ribbon that ties them together.  Finally, I added the stems.  I used a damp paintbrush to soften all the lines.
 I used a stitched oval die to trim my watercolour paper, matted it with some Sorbet cardstock and mounted it with pop dots onto my base.  I stitched my patterned paper with my sewing machine before adhering it to the card base, then tied a white organdy ribbon around it and finished up with some epoxy bubbles in blue & green.
 Check out what the rest of the design team has to share today over on the Ai blog, and you can link up your shower creation while you're there.
Watercolour sets used are: WC Flowers

Monday, May 2, 2016

A Wedding Card

Wedding season is upon us!  This sweet High Hopes image is called Just Married #TT026  and is perfect to customize with each couple's wedding colours.  I chose a champagne/grey combo with touches of peach and green.  You can't tell in the photo, but the papers and banner have a great shimmer to them, to dress up the card considerably:
 I coloured the image with Copic markers, and made up a few 3D flowers that I cut with my Cricut.  A few champagne coloured pearls, and a bit of twine finished it off nicely.
Found in the One Crazy Stamper store: High Hopes Just Married # TT026

Thursday, February 26, 2015

New Art Impressions Try-folds!

The Art Impressions Design Team are debuting four new Try-fold stamp sets today.  I have a wedding themed card with a matching gift bag and tag using Steeple TF Set (Sku #4578):
 Here is a photo of the card folded, and tied with organdy ribbon:
 When you untie the ribbon, both sides of the card fold out:
 I tried something new this time, I usually back the side pieces with white cardstock to hide the fact that the Copic markers bleed through the paper... but I used the patterned green paper that I mounted the base on - and I love the look!
 The stamp set comes with the three images and one sentiment "Blessings on this special day", and it includes all the instructions for you to stamp, fold and cut it accurately.  I also love that each of the images can be used individually, so I used the bench image to make a gift tag that I tied onto a matching bag made with my Gift Bag Punch Board:

Head on over to the Art Impressions blog to see what the other DT members have to share - and you can link up your creation for our challenge debuting today, called "Tie It Up" we want to see your creations that are tied up with ribbon or twine.
 Copics used: Greys are C7, C5, C3, C1, C00
Blues are B26, B24, B23, B21
Purples are V09, V06, V05, V04, V01
Pinks are R85, R83, R81
Greens are G46, G43, G40, YG03, YG01, YG67, YG63, YG61
Browns are E57, E55, E53, E51, E50


LinkWithin

Related Posts with Thumbnails