
Today I'm sharing what I'm calling an "Opening Easel Card" - using Art Impressions' brand new Square Easel Die (Sku #4699), and Twinkle in Tangle (Sku #4665). Here is a photo of it, tied shut:
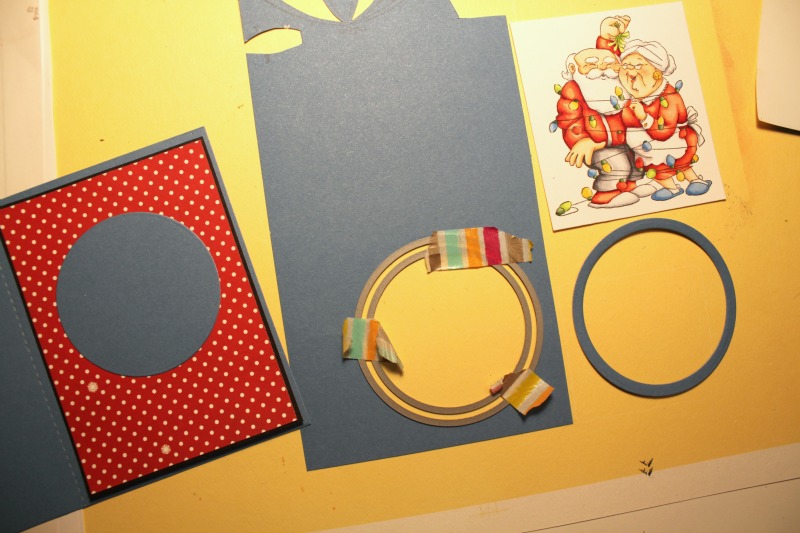
 I started by cutting two easel die pieces in blue cardstock with my Cuttlebug. Then using washi tape to hold together two circle dies, I cut out a circular blue frame:
 I added some patterned paper to the front of one easel piece, die cut a hole through all the layers and added my frame:
 Now for the part that's hard to photograph... when I glued my easel card together, I did not glue down the front easel piece that has the circle opening, so that it will open and close just like a regular card:
 I glued my matted image to the inside of the card, centering it under the circle opening:
 Here's a closeup of the snuggly couple:
 And finally a back view, which possibly shows it the best. You can see how I tucked in some organdy ribbon on both the front and back of the easel, so that after the recipient has opened and read my card, they can tie it back up and put it on display.




We have a brand new challenge beginning today over on the Ai blog - our theme is "Be Merry"! Share your holiday cards with us, and maybe you'll win a prize...
Happy Stamping!
Copics used: E11, E00, E000, C7, C5, C3, C1, R59, R27, R24, R22, R20, Y35, Y32, G28, G24, G21, YG05, YG03, YG01, B26, B24, B23, B21


