Showing posts with label Chris-mouse Mini Shaker. Show all posts
Thursday, November 24, 2016
More Christmas Mice!
I am on a roll using images that I've had coloured up for a few weeks, and getting them made into cards. I really love this little mouse from Art Impressions that is wearing a onesie - so perfect for paper piecing! And he is intended to work with the new mini Action Wobbles, so his jingle bell is popped up on one.
Patterned paper is Polar Pals by Doodlebug Designs; Cardstock is Bazzill Basics; Stamp set is Chris-mouse Mini Shaker (Sku #4796) by Art Impressions; Banner & Oval STAX dies; Copic Markers.
Tuesday, November 1, 2016
Chris-mouse Mini Shaker
Hello Ai fans!
I am having a great time making cards with the new Mini Action Wobbles! And of course the new Ai Mini Shakers are all designed especially for them... here is a quick card using Chris-mouse Mini Shaker (Sku #4796):
This week, the Ai Design Team are all using Therm O Web products on our creations, so on today's card, I've used the Deco Foil Foam Adhesive along with Gold Deco Foil Transfer Sheets to give the glimmer to my mouse's jingle bell. I also used the foam to die cut snowflakes - and they turned out SO amazing! These are the Ai Snowflake Dies (Sku #4804), and they are quite small and detailed. I started by running my Snowflake Dies and the Foam Adhesive through my Cuttlebug:
The foam is sticky on both sides, so I peeled the backing off one side of each snowflake, and laid them down onto the matte silver side (the back side!) of the gold foil, and pressed down:
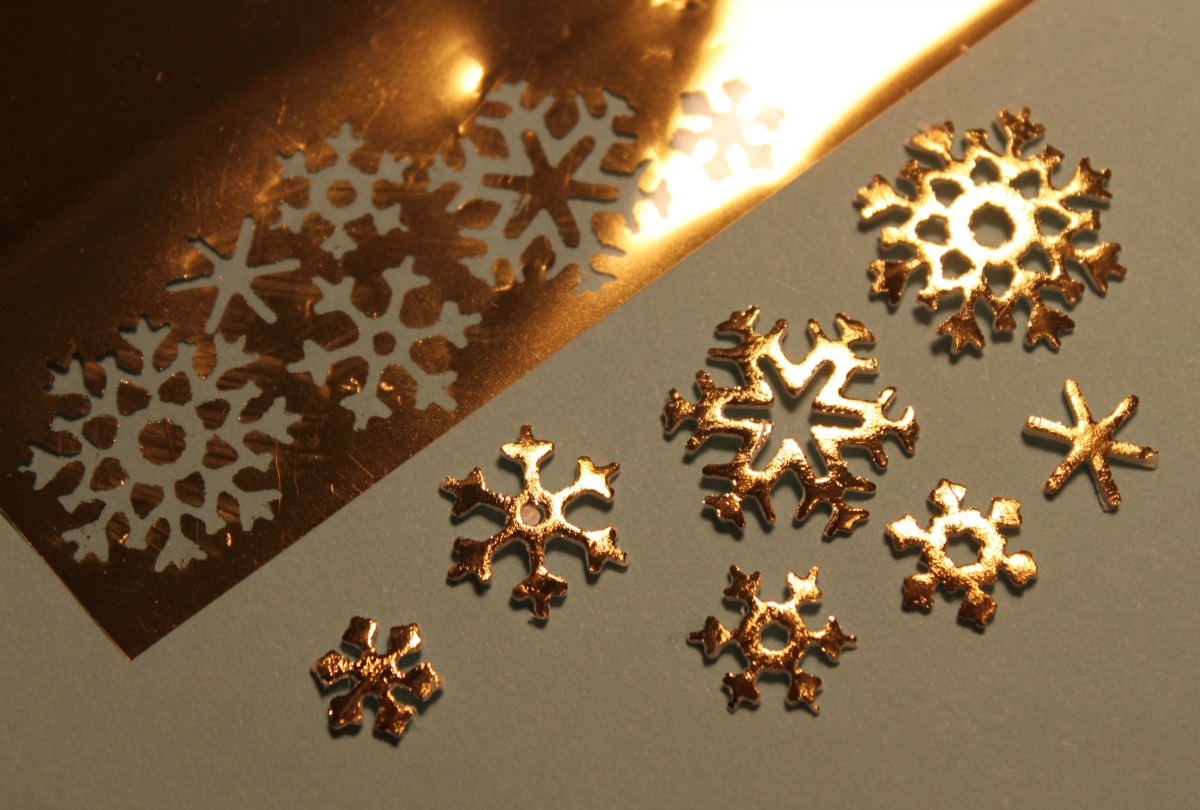
I flipped the foil over, and gently burnished the foil onto the snowflakes with my finger. Then I pulled off the foil and here are the results:
They're like little metallic foam stickers! All I did was peel off the backing and place them onto my completed card. What a great way to add foil touches to your projects!
The foam is sticky on both sides, so I peeled the backing off one side of each snowflake, and laid them down onto the matte silver side (the back side!) of the gold foil, and pressed down:
I flipped the foil over, and gently burnished the foil onto the snowflakes with my finger. Then I pulled off the foil and here are the results:
They're like little metallic foam stickers! All I did was peel off the backing and place them onto my completed card. What a great way to add foil touches to your projects!
Our current challenge on the Ai blog is Prep For Christmas! We'd love you to share your holiday creations with us - there are always fabulous prizes to be won. And don't forget to enter the great giveaway, below! Happy stamping!
a Rafflecopter giveaway
Copics used: C5, C3, C1, C00, R21, R20, B00
Subscribe to:
Posts (Atom)