Tuesday, December 8, 2015

Jingle Shaker

 December is humming right along, isn't it??  There is still plenty of time to get those cards made... and I am sharing one made with the cute Jingle Set (Sku #4681) - one of the holiday Shakers from Art Impressions:
I have several families that I send cards to that have small children - and I think the Ai Shakers are perfect for them - the kids will love making his tush shimmy.  Each shaker set includes the full body image, just the tush image, a die to cut out the tush... and one Action Wobble to get you started.  You can find all the Ai shakers here.  Happy stamping!
Copics used:  Browns - E70, E71, E74, E77, E57, E55, E53, E51, E50,
Reds - R27, R24, R22, R20,
Golds - Y26, Y21,
Greens - G28, G24, G21.


Sunday, December 6, 2015

Sweet Sunday Sketch #297

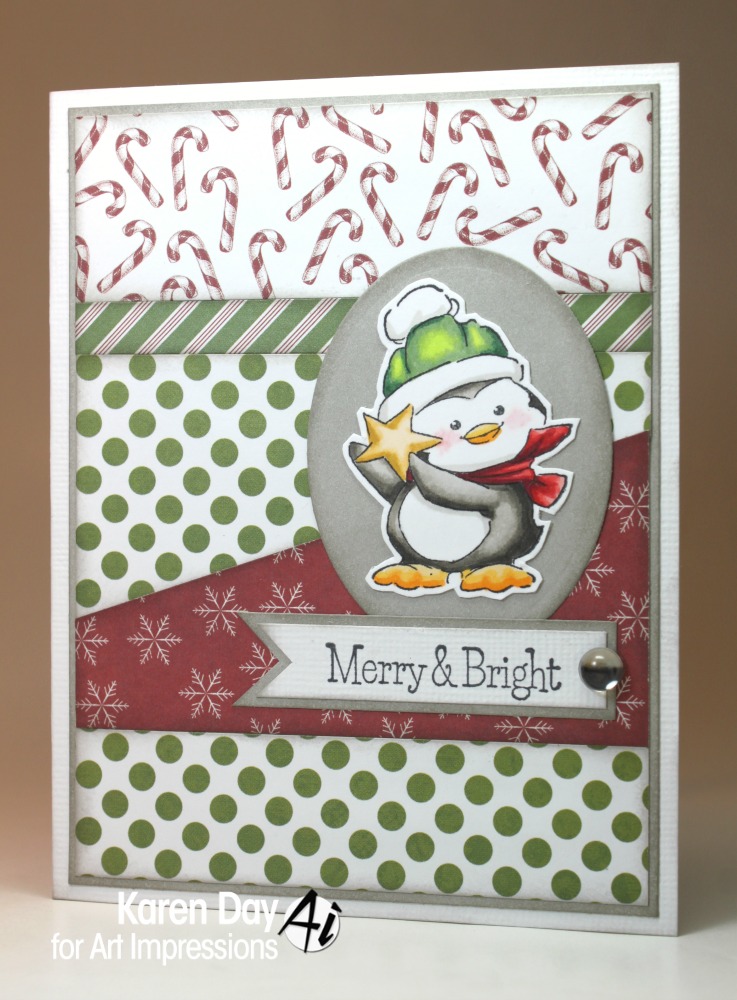
I had time to put together a couple of Christmas cards tonight - using a sweet little penguin image from Art Impressions.  I've used the current Sweet Sunday Sketch and some Teresa Collins papers:

Patterned papers are Candy Cane by Teresa Collins; Cardstock is Whisper & White Daisy, CTMH; Ink is Memento, Tuxedo Black; Copic Markers; Stamp set is Christmas Cheer Set (Sku #4666) and sentiment is Holly Jolly Set (Sku #4667) - both Art Impressions.

Wednesday, December 2, 2015

High Hopes & the Minc Machine

Hello everyone!  I am sharing a card & tag that I've made using both the High Hopes Snowman Mini Set (Sku #TT006EZ) and the Heidi Swapp Mini Minc machine (scroll down to see some how-to photos).  For today's projects, I created my own background paper using red foil & the Minc machine - and as many of you know, it is VERY difficult to photograph foil - so what looks like diagonal black stripes, is actually brilliant shiny red:
 I made my little snowman into a spinner card!  I stamped and coloured him with my Copics, then adhered some green polka dot patterned paper onto his backside - and fussy cut him out.  When I glued his front & back together, I sandwiched a piece of regular sewing thread between the two layers.  After creating my card base, I diecut a circular opening through all the layers.  I glued the thread at the top and bottom of the opening, suspending my snowman over the open circle - then glued down the black frame to cover the thread ends.  Before I send the card in the mail, I'll give the snowman a few spins and put the card into an envelope.  When the recipient opens the card, he'll flutter around several times for a fun surprise.
 Here's an angled photo to show the brilliant red paper (oh, the Minc machine is SO fun to use!!)
 And here's a photo of my little matching tag:
 You can find the Mini Minc machine and all it's accessories in the One Crazy Stamper store (here!).  Here is the machine, along with a 6" piece of red foil that is covering my striped black/white cardstock.  *The foil reacts to toner from a laser printer or photocopier - so I have a piece of photocopied striped cardstock under the foil.
 You sandwich the cardstock with the foil, inside an acetate transfer folder that comes with the machine.  My Minc heated up in about 30 seconds, and then I put the folder into the machine - here it is halfway through:
 In a few seconds, the folder comes out the back of the machine - and it has heat set the foil wherever the toner from the photocopier was.  Here I am peeling off the foil, and you can see the red metallic stripe underneath:
 The machine came with a photocopied image of a camera - so I ran it through my Minc with a piece of metallic pink foil, and here's the result:
 Now, you're all going to want to get one of these for Christmas (wink!) so tell your husband (or wife?) to head over to the OCS store - you'll see a link to the Heidi Swapp Minc Machines on the left hand side.  *Oh, and the machine only comes with a couple of small squares of foil - so pick out a couple of colours of foil that Santa can put in your stocking.
Found in the OCS store:  Heidi Swapp Mini Minc Machine

Tuesday, December 1, 2015

December One Crazy Stamper Challenge

We are starting a brand new challenge today on the One Crazy Stamper blog!  We would like to see your holiday creations - anything goes, just no digi stamps, please.  The Design Team are all sharing inspiration with you today - so head on over to the OCS blog to see what everyone has to show.  I'm using the fabulous High Hopes Snowman Mini Set TT006EZ, and I've made a shaker card for you:
There are three sweet snowmen images, two frames and the Think Snow sentiment included in the set (come back tomorrow to see the other two snowmen!).  I've made a 5" square card with a circular shaker, filled with sequins and one snowflake die cut that is peeking out behind her if you look closely.  I tried a new-to-me method of creating the shaker, I taped together two circular dies to form the black frame, and cut it out once in black cardstock, then three times out of some thin cardboard.  I grabbed some cardboard packaging from my recycling bin to upcycle - and it worked like a charm.  I glued all three layers together and glued them onto my card base.  I added gold, green & red sequins plus a die cut snowflake to the center, then glued on a piece of acetate, and finally the black cardstock frame to finish it off.  I attached my little snow lady to the bottom of the circle to look like she was leaning out of it.  I added a strip of gold foil tape and a few more snowflakes before calling it a day.
We would love it if you would link up with the OCS December challenge over on the OCS blog - you have until the end of the month to see if you'll win a prize!
One Crazy Stamper products used: High Hopes Snowman Mini Set TT006EZ


Tuesday, November 24, 2015

Art Impressions at Michaels

 I am sharing three cards that I made using one of the two new Art Impressions Christmas stamp sets that you can find in Michael's stores right now...

 There are three fun images, and three great sentiments in this set.  Here's the tangled kitty:
 And this is my absolute favourite image in the set, because it reminded me of a Charlie Brown Christmas tree:

  I used all kinds of patterned papers, a few snowflake die cuts and some clear grey acrylic gems.
Happy stamping!
Copics used: C5, C3, C1, C00, BG18, BG15, BG13, BG11, Y26, Y23, RV25, RV19, RV15, RV11


Monday, November 23, 2015

The Challenge

I was able to put together a couple of Christmas cards tonight, to play along with The Challenge.  I love this new sentiment stamp from Close To My Heart, and it fits perfectly on the Spellbinders Heirloom Ornament die:
Patterned papers are White Pines, Cardstock is Olive, Glacier & Cranberry; Ink is Chocolate; Stamp is This is Christmas - all Close To My Heart; Poinsettia die, La La Land Crafts; Spellbinders Heirloom Ornament die.

Saturday, November 21, 2015

Simple Christmas

It was a productive day on the cardmaking front!  I was able to complete 6 Christmas cards, and have 2 more cut and ready to assemble - go me!  I am also making an effort to use papers from my stash, so here is a simple Christmas card that is using some Basic Grey paper from a year or so ago:
Patterned papers are Eskimo Kisses and Urban Prairie, by Basic Grey; Cardstock is Ruby, CTMH; Stamp is This is Christmas, CTMH; Ink is Rich Cocoa, Memento; Twine is American Crafts; Vintage Ornament die, Spellbinders.

LinkWithin

Related Posts with Thumbnails