Another great Black Friday sale happening at Art Impressions this weekend! Click here for 20% off your order:
Friday, November 29, 2019
Thursday, November 28, 2019
Black Friday Sale on Tombows!
Just a quick post for all you avid Tombow Dual Brush users! Tombow is having a weekend sale. Click here to find the deals! Use the code: BLACKFRIDAY2019 to save 40% on your order.
Wednesday, November 27, 2019
Vintage Art Impressions
Here's one from a few years ago, that once again, I'd stamped and was just waiting to colour.
Stamp is Art Impressions (retired now!) and the sentiment is an older Close To My Heart set.
Patterned paper is Fancy Pants Designs.
Stamp is Art Impressions (retired now!) and the sentiment is an older Close To My Heart set.
Patterned paper is Fancy Pants Designs.
Tuesday, November 26, 2019
A Merry Hedgie
Just a quick, cute card to share - this is a little hedgehog from High Hopes Rubber Stamps, coloured with Copics and diecut with my Hemstitch Oval dies from Spellbinders.
Patterned paper is older Close To My Heart, Merry die is Echo Park, and the holly is Seasonal Sprigs from Crafter's Companion.
Patterned paper is older Close To My Heart, Merry die is Echo Park, and the holly is Seasonal Sprigs from Crafter's Companion.
Labels:
Christmas card,
Copic Markers,
Hedgehogs,
Karen Day
Monday, November 25, 2019
Christmas Cheer
I had 4 of these little bears from Art Impressions "Christmas Cheer Set" stamped out, ready to colour, so I pulled out my Copics and got busy.
I fussy cut them out, and mounted them onto card bases that I had ink blended with Broken China Distress Oxide ink, and a Close To My Heart sentiment.
I wanted to create a bit of a snowy background, so I spattered first, with white paint, and then with water - and it hardly shows! Ha! I felt like I was really going to town.
I am happy to add four more cards to my stash!
Sunday, November 24, 2019
Sweet Christmas card
I have another sweet High Hopes image on a simple Christmas card today:
I coloured him with my Copics, die cut the image with a stitched square die, and adhered him to the base with a black mat. The die cut "merry" is from Echo Park.
Elf Cards
I have been enjoying pulling out my Copic markers over the last few weeks, have been colouring up images that I've had stamped for several years, and am making an effort to use up papers that I've had for just as long.
These are two images from High Hopes Rubber Stamps, and a sentiment from Verve.
These are two images from High Hopes Rubber Stamps, and a sentiment from Verve.
Paper is Elf Magic by Bo Bunny
Two more for my stash!
Monday, November 18, 2019
Speed Tagging
Here's one of those projects I've had ongoing for a couple of weeks, as it had to be done in stages. This is the amazing Speed Tagging system created by The Greetery in their October release:
This is a very efficient way of creating a large volume of tags in a short time (and they're lovely!) I won't go into too many details, as you'd see it better on The Greetery's blog - but there is a base stamp that you ink up all in one colour and stamp all the tags at once onto a 6x6" piece of cardstock.
There is another stamp set with the sentiments, and all of the bits and pieces, and when combined with your Misti - it all happens very quickly.
I used three different colours of Distress Oxide inks (Blueprint Sketch, Evergreen Bough and Mowed Lawn) for the tag bases. Then used those, plus Candied Apple & Crushed Olive to stamp the accessories.
The sentiments are stamped in Versafine Black Onyx, which gives a nice crisp image.
The only thing left to do is to add bits of twine, and I'm going to give sets of these away as gifts to friends and coworkers!
So what you see below - I created 8 times! 168 tags in total. It would've taken me months to create this much individually, and even though I spread it out over a couple of weeks amidst other projects, I would guess that this is only 5 or 6 hours, and they do look pretty spiffy if I do say so myself :o)
Thursday, November 14, 2019
Watercolor Weekend - Elf Magic
The elves are running amok amidst the presents under the tree... It's my latest offering for Art Impressions' Watercolor Weekend:
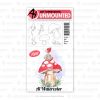
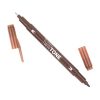
There was a lot of pre-planning on scrap paper for this one! I wanted to use all four elves from the 5125 - WC Elves Set, so I played around with positioning based on their poses and the angle of how their heads were tilted, until I got something that I could work with. I also wanted them to be in and around the presents, so had to figure out the shape of the parcels, while still leaving room for the branch to hang down. I positioned all four elves on the same block to ensure they were placed correctly, and coloured them first in Tombow #565 Deep Blue, and then #969 Chocolate - stamped them off on scrap paper and then onto my Ranger Watercolor Paper. With a pencil and ruler, I drew in the presents, and lightly drew a line where I wanted the branch to be.The elves are painted with #837 Wine Red, #177 Dark Jade and #969 for their shoes. A touch of #850 Flesh for their skin tone, and #026 Yellow Gold and #969 Chocolate for their hair. The presents are painted with #026, #565, #969 and #N65 Cool Grey. I layered the colour to get the darker shades on some sides of the boxes, and went in with the fine points of the markers to draw the crisp edges of the boxes in. I dove into my Christmas wrap to dig out a bow, and loosely sketched it in on the large present, painting it in with #565 Deep Blue. With the pine bough from 4867 - WC Foliage Set 2 New, and my #249 Hunter Green marker, I repeatedly stamped it to create the tree branch. After dabbing it lightly with my damp #1 paintbrush, I went back in with the fine point to draw in a few needles, and darken a few areas. I picked up #565 from my palette, and painted a faint blue wash in the background, and also used it to add shadows in and around the elves & presents. Since this paper has a fair bit of texture, some of the definition of the elves had been lost in the stamping, so I used my TT41 - TwinTone Marker - 41 Chocolate to redraw the outline of the elves.
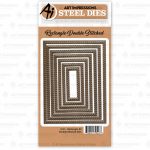
The image is die cut with one of the 5063 - Rectangle A2 Double Stitched Dies. I wanted a softer edge to my scene, so I used blending brushes with two shades of Distress Oxide Inks (Evergreen Bough & Blueprint Sketch) to shade the outside of my rectangle giving it a bit of a soft focused look. I matted it with some dark blue cardstock and adhered it with pop dots onto my plaid card base, then wrapped it with an organdy bow. A few sparkles liven it up a little!
The Elves Set isn't a Christmas stamp set, but they work perfectly when you colour them up right! Dive into your supplies and see if you can use something non-Christmassy for a holiday card. Be sure to check out the Art Impressions blog on Saturday to see what Dot & Tricia have to share.
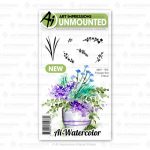
Click here to do some holiday shopping for a Beginner Watercolor Artist on your list!
Affiliate links with no extra cost to you:
Wednesday, November 13, 2019
30 Day Colouring Challenge
Although I'm not officially participating in Kathy Racoosin's 30 Day Colouring Challenge... I am playing along. It may not look like I'm crafting due to my sparse blog posts, but I've been prepping all kinds of images, and really enjoying colouring with my Copics. If you're like me, you stamp multiples, and don't always get them finished. So that's my mission this holiday, to use up as many older, already-stamped images kicking around in my files. Here's a stack of images from Art Impressions and High Hopes:
I'll have a flurry of posts once I start making them up into cards!
Wednesday, November 6, 2019
25 Days of Christmas Tags
I have been tag-making-up a storm this week, and today I have 4 tags to share that I made to play along with Tracey McNeely's 25 Days of Christmas Tags. I loved her tag from Day 1, and did my own version with a few die cuts and some ribbon:
Here was Tracey's tag that inspired me:
The event is on all month long, so I hope to play often!
Friday, November 1, 2019
2019 Fall/Winter Coffee Lover's Blog Hop!
It's Day 1 of the 2019 Fall/Winter Coffee Lover's Blog Hop! I pulled out an image and sentiment from a Verve digi set from a couple of years ago to put a little Pumpkin Spice card together:
Bit of a busy card with a mish-mash of die cut shapes and patterns... (It's a little less wild looking in person!) Just using up a few older paper bits and pieces from some Doodlebug designs sheets, as it's a bit of a mission of mine to use things up from my craft room stash! I'll be back with a few more fall & wintry coffee cards later throughout the week. Enjoy the hop!
Bit of a busy card with a mish-mash of die cut shapes and patterns... (It's a little less wild looking in person!) Just using up a few older paper bits and pieces from some Doodlebug designs sheets, as it's a bit of a mission of mine to use things up from my craft room stash! I'll be back with a few more fall & wintry coffee cards later throughout the week. Enjoy the hop!
Subscribe to:
Comments (Atom)


