Monday, December 30, 2019

Top 12 of 2019

I always love doing this post!  I literally go through each post from each month, and pick out a personal fave.  Some months are harder than others to choose, but you can see that Art Impressions is prominently featured.  I was thrilled to join their Watercolour Design Team in February, and have loved working on my skills in that area, but I still use their regular line products often.  I've enjoyed playing with Lawn Fawn products, and a new company The Greetery that started in the spring (scroll down to the bonus pick).  I had a few of my cards appear on the Home Shopping Network with Ai (see June!) - so it's been a wonderful crafty year!  Looking forward to some new creations in 2020.  Thanks for stopping by :o)
January:
February:
March:
April:
May:
June:
July:
August:
September:
October:
November:
December:
And a bonus favourite!:

Sunday, December 22, 2019

For You Deer tags

I got some happy mail a few weeks ago, from the wonderful Tracey McNeeley... who puts on the "25 days of Christmas Tags" event in November.  I was lucky enough to win a draw she made, and I received these adorable stamps/dies from Lawn Fawn:
 This is the For You Deer stamp set, with matching dies, and the tag die add-on set (shopping links below).  They're so cute!
 There are all kinds of sentiments in the set, some that work for other occasions too.  And... they are front & back stamps, so you can see their behinds on the flip side of the tags where there's room to write:
 I managed to get 20 of the tags made, as well as about 35 tiny bookmarks that I put in my Christmas cards for coworkers.  If you just use the reindeer and polar bear on their own, they make the sweetest little bookmarks that are about 1 1/2" tall:
 And the backside:
Even though I will likely make & post a few more Christmas cards over the next few weeks, this is probably my last post prior to Christmas, so I want to wish everyone a very happy holiday!  Stay tuned for a "Top 12 of 2019" post next week.
Lawn Fawn - Clear Photopolymer Stamps - For You, DeerLawn Fawn - Lawn Cuts - Dies - For You, DeerLawn Fawn - Lawn Cuts - Dies - For You, Deer Add-On

Friday, December 20, 2019

Simple Stories Sub Zero

Oh, how I love these papers!  The snowflakes are cream coloured - which is just a little different, and I love the mix of colours.  I used one of the busier patterned papers in the collection to do a fairly simple card with a grouping of die cut greenery:
I give out a bunch of Christmas cards to men that I work with, so this was one of my masculine card designs this year!  The sentiment is an older Close To My Heart one.

Wednesday, December 18, 2019

Christmas Cheer!

I really love this little bear duo from the Art Impressions #4666 - Christmas Cheer Set!  I've used them a number of times, and I'm not tired of them yet.  Here they are paired with the lovely Sub Zero papers from Simple Stories:
 The bears are coloured with Copic markers and die cut with a stitched square die, then mounted to the base with pop dots.

Monday, December 16, 2019

Christmas cards in The Greetery style!

I love absolutely everything from The Greetery by Betsy Veldman.  I was given the Mason Jar stamp set as a gift from my niece, and recently purchased the Budding Beauties - Autumn set so that I would have something to put in the jars!
The stamp sets are well thought out, many are designed to go together, and the results are simply stunning.  For both the 3-step jar and 4-step botanicals, I set them up in my Misti - so once they were positioned, I was quickly able to stamp multiples.
I used Distress Oxide inks for the stamped images and my blended backgrounds, and then I ran an embossing stylus around the edges to create a raised frame.  The jar and one of the sprigs are raised up on pop dots, which adds to the 3D effect.
My first combo was using softer, icier colours - and I pulled out some stronger colours for my second combo:
 Before assembling, I took the two brown stem stamps, and barely inked them up in a much lighter brown, and stamped them on top of the mason jar to give the appearance of the stems being in the glass.
 You can vaguely see in the photo below that I added some iridescent Stickles to the flower and sporadically on the leaves and jar.  Makes them have a nice little sparkle in real life!

After these first few were made and photographed, I put together 8 more, and got brave enough to splatter the ink blended background with some water, and then with some deep blue ink:

Saturday, December 14, 2019

100 Tags

Yes, 100!  Tags are easiest when made in multiples... and this year I decided to make a bunch to give out as little gifts, added to a package of hot chocolate, or slipped inside Christmas cards.  Two years ago, I was lucky enough to win several Reverse Confetti stamp sets and their matching dies from Leigh Penner in the Season of Giving hop that happens on January 1st. 
 I set up my Misti with a bunch of the images (there are ornaments, mittens and Christmas lights), and stamped them in 5 different Distress Oxide inks.
 I die cut them all out, then using some basic Close To My Heart tag dies, I cut out white tags that I did an ombre ink blended effect from the top down.  For the mitts, I die cut out a second white mitt, so they would be a pair.
 I dug out my stash of Baker's twine, and tied them all together, adding one of the basic tags behind each stamped one (so there is a spot to write on).
I know... you're questioning the pink & blue?!?  I buy a lot of multi-coloured wrapping paper, and didn't want to just do the classic red and green... so there you are.  The colours of Distress Oxide inks are: Mermaid Lagoon, Picked Raspberry, Candied Apple, Twisted Citron & Mowed Lawn.

Thursday, December 12, 2019

Art Impressions Wreath card

I have another card to share made with the Ai Exclusive set for Scrapbook.com:
 I stamped in Versafine Onyx Black ink onto my Canson XL Watercolour Paper, then scribbled my Tombow Dual Brush markers on to my palette, and picked them up with a wet brush to use like watercolours.
 This painted up in no time, and I added one of the sentiments in the set underneath the image.  I used my sewing machine to stitch the panel onto some metallic blue cardstock, and attached it to my base with pop dots.  A few sequins finished it off.


Thursday, December 5, 2019

Exclusive Poinsettia Set!

I am SO IN LOVE with this exclusive Art Impressions stamp set for Scrapbook.com!  It's called 5206 SBC Poinsettia Exclusive Set, and is just lovely to work with... stay tuned, as you'll be seeing more from this set in the days to come!
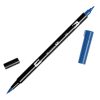
I used the largest image in the set, stamping it twice on my Canson XL Watercolor paper with Versafine Onyx Black ink, and then embossed them both with clear embossing powder.  For this project, I used my Tombow Dual Brush markers - scribbling them onto my palette, and picking them up with a damp paintbrush after mixing varying amounts of water.  I use a "glazing" technique, starting by colouring each section of the image with the lightest colour, then layering on more colours, getting darker each time.  All the poinsettia petals got a pale wash of #991 Light Ochre, and then I began adding three different layers of #837 Wine Red - a pale pink layer, and then 2 more, concentrating the colour near the veins.  I wanted to warm up the tips of the petals even more, so I added #946 Gold Ochre, which gave them more of a peachy glow!  The leaves were done in the same manner, starting with #991 to give a yellow undertone, then layers of #158 Dark Olive, #249 Hunter Green, and finally a mixture of #565 Deep Blue & #249 Hunter Green for the darkest tones.  I kept the holly greenery light & bright using #991, then #126 Light Olive.  I used my artistic license to colour the holly berries with #533 Peacock blue and shaded with #565 Deep Blue (red berries just wouldn't look right!)
Since the image is stamped in black, it meant that all of the ferns and delicate foliage remained black, so I painted a pale green wash behind them to suggest greenery, and then continued to paint a wash of blue & green, just to break up the plain background a little.  I used one of the sentiments from the set, and stamped it with my Misti.  The image is matted with some metallic blue cardstock which really picks up the colour of those berries!  I adhered it to a moss green card base using 3D pop dots.
Click here to find the stamp set on the Scrapbook.com site!
I did a second version, omitting the warm yellow tones, but otherwise using the same techniques and I added a few paint spatters at the end:
Be sure to visit the Art Impressions blog on Saturday to see what Tricia & Dot have to share with you!  And if you have a Watercolor enthusiast on your Christmas list this year, click here to see the gift guide on the Ai website to help get you started.
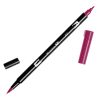
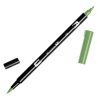
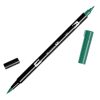
DB837 - Dual Brush Pen - 837 Wine RedDB158 - Dual Brush Pen - 158 Dark OliveDB249 - Dual Brush Pen - 249 Hunter GreenDB565 - Dual Brush Pen - 565 Deep BlueCanson XL WC Paper PadWCPLT - Watercolor PaletteTsukineko - VersaFine - Instant Dry Pigment Ink Pad - Onyx Black

LinkWithin

Related Posts with Thumbnails