Saturday, November 23, 2024

Christmas Pudding

I've pulled a few different products together to create today's card.  The Christmas Pudding die set, and the Cooking Up Christmas stamp/stencil set are both from The Greetery, combined with several different dies for the pine boughs and foliage.

This was a labour of love!  There are ten colours of cardstock and seven inks involved... and much fussy cutting.  And when you go to this much trouble, you make more than one, so I have eight of these added to my stash.  You should see my craft desk, it's like a bomb went off.

I wanted a little glimmer, so I used brushed metallic gold paper to cut out the Joy sentiment, and spattered some gold paint on the finished product.  Happy to have these completed, and plan to spend the next hour tidying up my craft room :-)


Monday, November 18, 2024

Winter Farmhouse

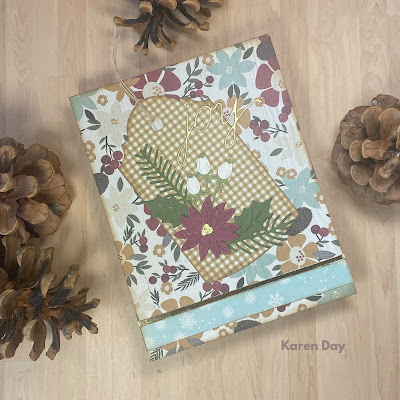
I've been hoarding the Winter Farmhouse papers from Simple Stories for a LONG time!  But I am slowly trying to use them up.  I had precut the tag, and had the bits and pieces from Spellbinders Holiday Blooms die set already on my craft desk... so this card was born.

The Joy is an old Memory Box die that has been in my stash forever... and the little gold strip was cut off of a panel that I'd run through my Minc machine this weekend.
This is one of the rare times that I haven't added foam tape to a card!  It'll be a good one to mail.

All supplies were bought from the Papercrafter's Workshop.


Sunday, November 17, 2024

Poinsettia Spray

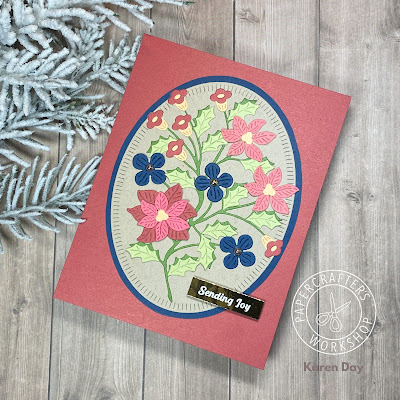
I'm wanting to revisit some of the stamp and die sets that I've acquired this year, and this Poinsettia Spray die set from Spellbinders is one of them.  I've tried it with an arch and a rectangle, but never an oval, and this is the most traditional colour combo that I've done.

I wanted a warmer card, so added the soft yellow to the mix, and LOVE the kraft base.
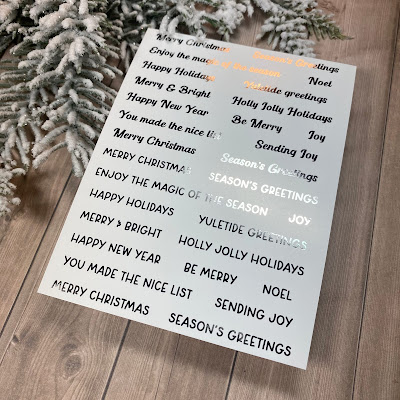
The sentiment is the Christmas Sentiments Foilables from Pink & Main.
All supplies are available at The Papercrafter's Workshop.


Saturday, November 16, 2024

Holiday Blooms

 I wanted to revisit my Holiday Blooms die set from Spellbinders - I have bags of precut bits, ready to go, so I decided to do a bright version today.

I started with my Nested Postage Labels & Tag dies - also Spellbinders, masked it off and did some ink blending with Broken China Distress Oxide ink.  Then I began building my spray.

I wanted something small and sparkly for the sentiment, so I used these new-to-me Foilables from Pink & Main.  I haven't used my Minc machine in a long while, but these were so quick and easy to do... so I foiled one panel in gold, and cut apart the one sentiment (I'm set for a long time now!)

You can get the Foilables and Spellbinders products from The Papercrafter's Workshop.


Friday, November 15, 2024

Simon Says Stamp Exclusive from Art Impressions!

The Art Impressions Design Team are all sharing projects of the Ai Exclusive set for Simon Says Stamp - available exclusively on the SSS website.  I know there are a bunch of Matchbook fans out there, so you're going to love this one!  Here is 5950 - Christmas Town MBE:

If you aren't familiar with the Matchbooks (you can find them on the Ai site here!), they are tiny - less than 2" square.  And even though they have quite a 3D appearance, they fold flat, and can be put into the tiny matching envelope - scroll down to see mine.
I've used the brand new 5962 - Classic Christmas PP papers, and coloured up my scene in coordinating Copic marker colours.  A few Stickles were added to the trees and lamppost.
In order to put the Matchbook set together, you will need the 5318 - MB Envelope Dies (shown here), and they come with these cute little envelope and tag dies, plus a few others.  The other set required is 5317 - MB Template Die, which is the 'house' base with that little scalloped edge.
My second card is the CAS version!  Who says the set is just to be used as a Matchbook?  I stamped and coloured just the main background of houses, and the small trees, and created an inked sky for them to sit against.  
You could trim the houses and glue them down flat, but I liked the 3D idea.  For mailing, the houses can just be flattened before you put them in a regular A2 sized envelope.
Check out the Ai blog to see what the rest of the design team has to share, and there will be more artwork on the SSS blog, too.


Tuesday, November 12, 2024

Shine Bright

 I have been struggling to get into Christmas cards this year... but seemed to break through my block by creating a bunch of bold rainbow themed Christmas projects today!  I was inspired by the Shine Bright stamp set from Pigment Craft Co., and knew that I had the Lawn Fawn Really Rainbow Christmas paper pack from a few years ago...


I used Festive Berries, Wild Honey, Mowed Lawn, Broken China and Shaded Lilac Distress Oxide inks, applied directly to my stamps with sponge dawbers and the help of my Misti.  I got an assembly line going and created panels for four cards.


I loved the look so much, that I die cut six tags with the Ai tag die, and stamped the same design.  My Glossy Accents was a little thick, but if I can get it flowing again, I may add it to the lights.


Before assembling my cards, I cut tag bases out of the coloured paper, and used the Snowflake and Quirky Owl Ephemera packs from Simply Stated Design (they're Canadian!) to put together four smaller tags.  I used my Lawn Fawn Tiny Christmas Tags for a small accent, and stamped them with holiday sayings.


Ten tags and four cards created today!  My stash is building...  *You can find Lawn Fawn, Distress Inks and Simply Stated Design products at the Papercrafter's Workshop


.  

Sunday, November 10, 2024

Christmas Sprigs

I have two more cards that I made to show off wax seals, using a bunch of different Spellbinders products.  The two die sets are Sealed Botanical Sprigs and Sealed Christmas Sprigs

I die cut all kinds of pieces from the die sets in holiday colours, and then arranged them into bouquets to show off my wax seals.  Several of the pieces were cut from the Spellbinders Gold Treasured cardstock, which is a lovely brushed gold.

I had to improvise with my wax seals, as I don't own any Christmas ones!  This leaf from Made of Honour worked well in a dark red wax with a gold paint accent.

I used some patterned papers from my stash, and added accents of brushed gold, and used decorative background dies.

I struggled a bit to figure out how to add a sentiment (without would've worked!), but since I wasn't adding twine or thread to the bundle, I just added a little stamped banner.

For this seal, I just used a blank stamp, then glued on a gold snowflake diecut.  You can get all your Spellbinders/wax seal needs from The Papercrafter's Workshop!


Friday, November 8, 2024

Warm & Wonderful

Squeaking in a last minute entry into the 2024 Coffee Lover's Blog Hop this afternoon!  I did an updated version of a card I made last year, using the lovely Warm & Wonderful stamp and die set from The Greetery.  I love it paired with the Winter Farmhouse papers from Simple Stories so put a couple of cards together today (the second one's not quite finished... we'll see if it gets posted).

More stamping than I've done in a while with this one!  But so worth it.  I used Distress Oxide inks with the help of my Misti to line everything up.

A few Champagne pearls from Pinkfresh Studio finished it off.
Thanks to Amy Tsurata for the fun event that she puts on - all the work is much appreciated!


Thursday, November 7, 2024

We Flamingo Together

Two more flamingo cards using Flamingo Together by Lawn Fawn.  This time I wanted to bling things up a little, so I used glitter paper to cut out the palm trees, and matted my oval background on some green glitter paper.  Really happy with these!  It'll be nice to have a few fun cards in my stash.

You can get all your Lawn Fawn products at the Papercrafter's Workshop!


Wednesday, November 6, 2024

Frosty Pumpkins

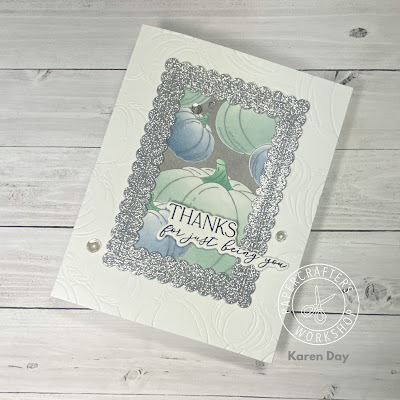
My last two cards with the September Betterpress Society plate "Raining Pumpkins" were created from an idea I had to have the center of a card be uninked - just the impression only.  Once I had my two panels made, it seemed like the perfect idea to make two cards, switching out the middles.


The uninked panel was simply a Porcelain Cotton Card panel run through my machine - I would do this again, it makes a beautiful background all on it's own.  A second Porcelain panel was created after inking the plate with Hickory Smoke Distress Oxide ink, giving the lovely grey background.  I used the coordinating stencils to ink the pumpkins in Faded Jeans and Iced Spruce, with Evergreen Bough for the stems.


I used the Scalloped Rectangle dies from Pinkfresh Studio cut in the Spellbinders Treasured Silver Glitter cardstock - cut twice, and layered with a frame of white for some extra dimension.  After cutting out the center of the panels using a rectangle die of a similar size, I adhered my panels onto card bases, switching out the middles, and adding the glitter frames.


The first card also got some vellum leaves tucked around the frame, and a pressed sentiment from the You Are Everything Betterpress Sentiment set.  Both cards got a sprinkle of silver sequins as well.


You can get a subscription to the Betterpress Society through the Papercrafter's Workshop.


LinkWithin

Related Posts with Thumbnails