It's my day on the
Art Impressions blog, and I think I just coined a new product name... today I am sharing a Faux Globe with you (snow globe, get it?) using the sweet
Lighted Snowman Set (Sku#4349). A few days ago, Kate our wonderful Design Team Coordinator, got me thinking of 3D items... and with the current popularity of Mason jar crafts, I decided to try making my own little snowglobe. Here's what I came up with:
This is definitely not the norm for me!! I wasn't even sure if it would work, right up until I screwed the lid on... but voila! It did! I will admit that while I was inhaling glitter up my nose, and having batting stick to my gluey fingers, I may have muttered Kate's name a few times (smile!) but I think she did me a favour in getting me to think outside my box.
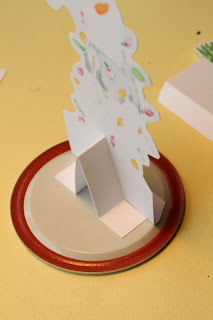
I stamped my snowman and coloured him with Copic markers, then cut around him, leaving about 1 1/4" of paper at the bottom, with a score mark 3/8" up. I also stamped a couple of trees in the same fashion to use as a background. Both pieces were glittered up. I also made a little brace which you'll see in the following photos, which helped hold the pieces upright.
I used Liquid Glass to glue the snowman to the lid, with the little brace behind him.
Then I glued the trees into place.
I glued pieces of quilt batting in front, between and behind all of my pieces, and liberally sprinkled it with glitter. Before putting the jar on, I dotted a little Liquid Glass on the inside of the jar, and tossed in some glitter so that it would look like glittery snow sticking to the inside of the jar. Now you hold your breath, hold your tongue right, and carefully put the lid on and screw it tight. I added a piece of ribbon, and a button and bow around the bottom to finish him off. Here's a closeup of my little guy:
All in all, it probably took the same amount of time or less than it takes to make your average card. Hope you'll all make your own Faux Globes this season!


