Thursday, August 31, 2017

Halloween Shadow Box

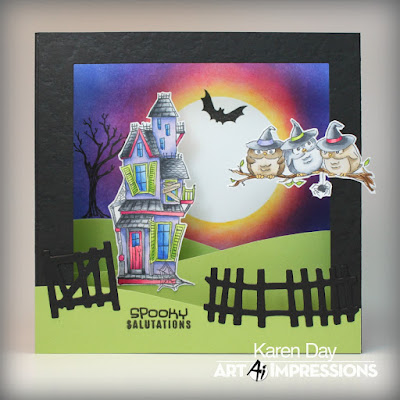
Today I am literally stepping outside the box!  Halloween is definitely the occasion that is the most fun for me when it comes to cardmaking, and I knew that the Happy Haunting Set (Sku #4940) from Art Impressions required something special.  This set is just screaming for you to make a scene!  I decided that I would learn how to make a shadow box card:

I started by cutting a circle mask from a post-it note, and used my Distress Inks to sponge a spooky night sky:
 I cut two pieces of black cardstock 5" x 7", scoring at 1/2" and 2".  On one of them I used a 4" square die to cut out a window:
 Using some lime green cardstock, I cut three hillsides in graduated heights, and scored each of them 1/2" from each side to attach them to the walls of the shadow box:
 I coloured up the haunted house and owls on a branch using my Copic markers (I'm all about bright and fun for Halloween, so that dictated my colour choices):
 I trimmed the background panel to 5" square, stamped the tree and bat, and trimmed the highest hillside piece to fit on it and glued it all down.  I joined the two black pieces together, folding on the score lines.  The house is attached to the middle piece, which sits 3/4" in front of the back:
 I glued it all together, added the owls and the lowest hillside to the front of the box, and here is the finished product:

I stamped one of the seven sentiments that is included with the set, and I (ahem) *may* be sneaking a peek of a not-yet-released product that will be available soon on the Ai website!  (shhh...)  I had a blast making my shadow box, it took a little longer than your typical card, but the end result was worth it - oh, and it folds perfectly flat for mailing! 
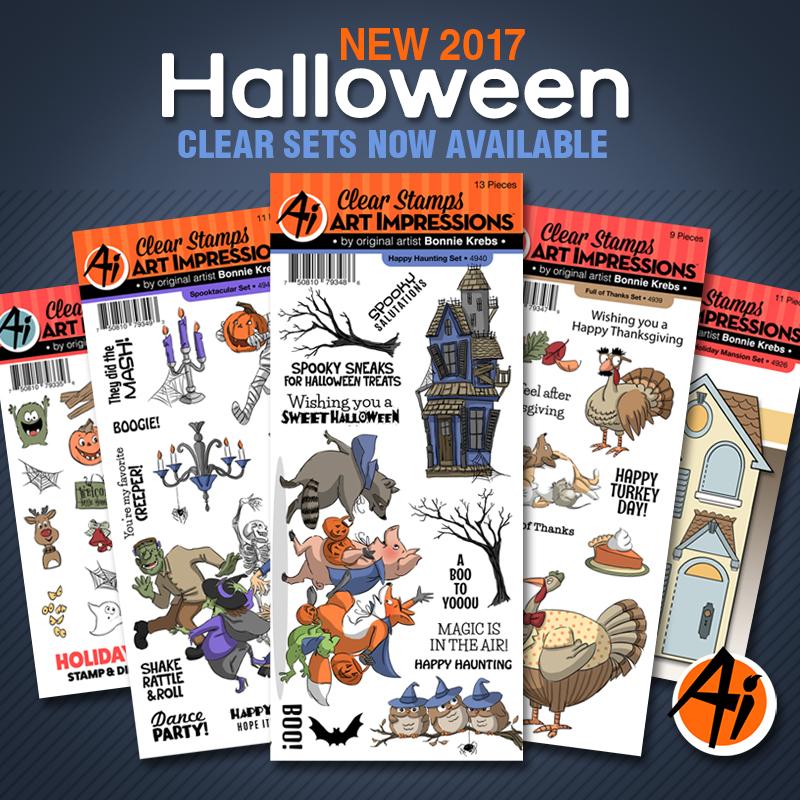
 The new challenge on the Ai blog is "Off Kilter" - we want to see your tilted panels on your creations.  *I'm going to go with tilted fences on mine!  Here are all of the Halloween/Thanksgiving sets that are now available on the Art Impressions website:

  Happy stamping!

Tuesday, August 29, 2017

Doggie Kisses Get Well cards

 I have a couple of sweet Get Well cards today - using the Ai Funny Farm collection set: Doggie Kisses (Sku # AiCS38):
 These are the cutest images!  Quick and easy to colour, too.
 You can't see it too well in the photos, but I did some zigzag stitching with my sewing machine, using a metallic gold thread from Gutermann.  I fussy cut around my image, and used pop dots to mount him and the paw print.  I kept the next one fairly simple:
 Copics used - Browns - E57, E55, E53, E51, E50
Greys - C3, C1, C00
Pinks - R85, R83, R81, R22, R20


Thursday, August 24, 2017

Orange & Purple Challenge

The Art Impressions Design Team are showcasing the three newest Ai woodmount stamps available in Hobby Lobby stores right now!  I have the sweet little Halloween sentiment that needs just a touch of colour, and I made it up into a quick card and a matching tag and bag to hold some treats:

I used my Memory Keeper's Gift Bag Punch Board to make a small sized gift bag in matching papers to hold a few Halloween goodies.  The Halloween stamp is perfect for a tag!
Here are the new stamps! 
Our current challenge on the Ai blog is Orange & Purple!  So head on over to the blog to see what the rest of the DT has to share, and you can link up your Halloween creation while you're there.
*Editing my post to add in this great promo put on by Ai for the rest of August - details are on the blog!


Tuesday, August 22, 2017

Quilted Sunglasses Case

 It's the August edition of Tuesday Threads with Karen.
 I've sewn a few larger projects for my sewing room over the last few months, so I decided that it was time for something quick & easy... and more of a personal item.  Here is my attempt of a quilted sunglasses case that I found on Pinterest (here):
 I started out by drawing out my pattern on a piece of paper, metric & standard measurements as shown:
 I cut the pattern out of two different fabrics from the Shop Hop collection designed by Ai owner/illustrator, Bonnie Krebs - available through Henry Glass Co.  I also cut a slightly larger piece of Therm O Web's Heat 'n Bond High Loft Fusible Fleece that I sandwiched between the two fabrics.
 I taught myself how to do a "stippling" pattern of free motion quilting with my sewing machine - which is an irregular squiggle pattern that you create by twisting and turning the piece to be quilted, as you sew.  I didn't have the right presser foot for my sewing machine, so I did the best that I could with my regular foot.  Here's a better shot so that you get the idea:
 I sewed a contrasting colour of bias tape around the perimeter of my shape, adding in a loop that will hold the case together when it's finished.  I flipped it over and hand sewed the bias tape on the underside for a clean finish.
 I folded the sides together as shown below, and stitched across them, about 2cm (3/4") in from each point.  When you turn the case right side out, these form little square bottom corners that give the case some shape, and allow it to sit upright.
I slip stitched the side edges of the bias tape together, and anchored the opening with a whip stitch to secure the ends - this will keep the glasses snug inside the case:

 And finally, I sewed a button on that will keep the case shut when the loop of bias tape is secured over it:
 This was so fun to sew!  It makes a great afternoon project, and would be a great gift for a Girlfriend.
Happy Sewing everyone!


Tuesday, August 15, 2017

Baseball anyone?

 I'm sharing a couple of cards made with one of the new Get Well stamp sets - here is Baseball Set (Sku #4904):
  These are fairly quick and fun - I let the patterned paper do the talking.
 These are just a little larger than a regular A2 sized card - I made them 6" x 4 3/4".  That oval die is a pretty good size, and I wanted to see more of the patterned paper.  I coloured them with my Copic markers and cut the sentiment into a speech bubble before adhering it with Pop Dots.
 Copics used - Skin tones: E11, E00, E000, E34, E31, R30, R20
Hair: Y26, Y23, E50, E18, E07, E02
Blues: B97, B95, B93, B91, B02, B01, B000, B0000
Oranges: YR07, YR04, YR02, YR00
Greys: W5, W3, W1
Browns: E55, E53, E51


LinkWithin

Related Posts with Thumbnails