Finally a post of something new! I've created 15 cards for different reasons, that I can't post yet... so I've been creating like crazy behind the scenes, and just felt like getting something put online. This was a practise card for one of my projects, and I really love how it turned out.
Friday, August 30, 2024
Gather
Friday, August 16, 2024
Spooky Crew
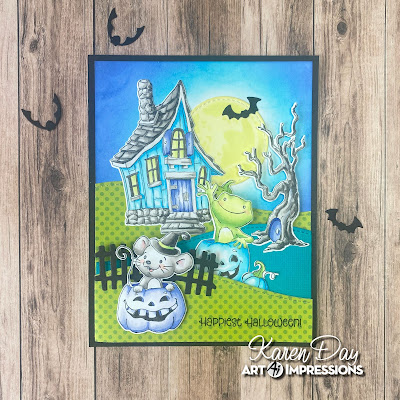
I don't give out Halloween cards, but I do love to make them! This is the new 5934 - Spooky Crew Set from Art Impressions.
I had a lot of fun colouring this set up with my Copic markers, and decided to try making a Halloween card without using any orange... there have been so many funky Halloween colour combinations being used on cards lately, that I wanted to see what I could come up with. I'm really happy with the results!
This set includes matching dies, so after colouring, I cut out all my pieces, and planned out my background. The base is just a 4 1/4 x 5 1/2" piece of black cardstock. On some white cardstock, I ink blended Mermaid Lagoon and Blueprint Sketch Distress Oxide inks, to create my night sky, leaving a white area where I attached a circle that I had coloured with my Copics to look like the moon, and sponged on a little Squeezed Lemonade ink. I made each of the hillsides into a flap, so that they open up from each side. If you remember the Ai Try-fold cards, you'll see what I was going for.
On the middle panel, I attached the tree and frog, and on the front panel I used 3D foam adhesive to attach the mouse over a black fence piece cut using 4967 - WC Fence Dies. The sentiment is included with the Spooky Crew stamp set. I also cut out a black bat from 5769 - Halloween FB Fence Set.
There's enough room on the inner panel to write a note to the recipient that would be hidden by the two flaps.
Sunday, August 11, 2024
More Betterpress Peacocks!
I have two more cards using the Betterpress Society's May press plate: Peacock.
My sentiments were pressed with Betterpress Black ink.

Thursday, August 8, 2024
Jumbo Berry
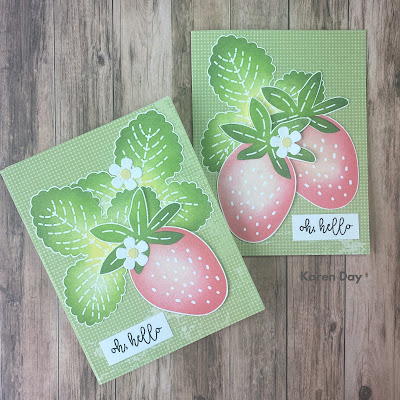
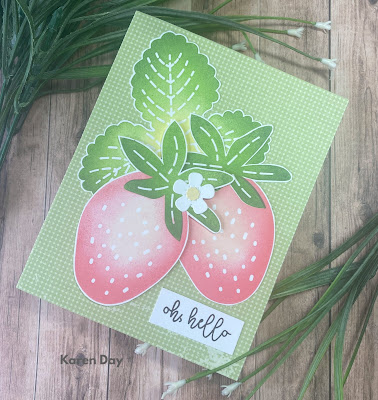
My Strawberry obsession continues! This is the Jumbo Berry set from Pigment Craft Company... and I just adore the scale of this. When I create, I like to make multiples once all my supplies are out, so I've got four A2 sized cards, all with just slight variations.
I used the sentiment from Latte Heart Elements, which I think is really cute. I had a few of the white die cut flowers leftover from my previous berry cards, so I tucked them in on a couple of the cards.
I am playing along with this week's Color Throwdown challenge! I haven't played in a long time, and when I spotted this week's challenge, knowing I was about to create strawberry cards - it was meant to be.
Wednesday, August 7, 2024
Peacock Slimline card
I've been playing with the May Betterpress Society press plate this week, which is called "Peacock". My first card is a slimline:
I finished off with a few irridescent gems for a little bling. You can sign up for a Betterpress Society subscription through the Papercrafter's Workshop.
Tuesday, August 6, 2024
Berry Patch
I recently bought several new (to me!) sets from Pigment Craft Company... and really wanted to use this one. This is Berry Patch, along with Berry Sentiments. Stamped with Distress Oxide inks, and a few Spellbinders flowers to finish it off.
Sunday, August 4, 2024
Floral Butterfly
Hello Ai Watercolour fans!
I've gone all floral this week, with a butterfly concept that I've had in my head for awhile, and have finally put it on paper:
I wanted to create a butterfly totally out of Ai flowers/leaves. I was very inspired by the new 5936 - My Hope Set and 5937 - My Trust sets from the Bible Journaling line, so I pulled them out and set to work. I first practised on scrap paper, drawing a pencil outline of a butterfly, in order to plan out which stamps would fit inside the shape. I also picked my colour palette, as planning out what colour each of the flowers would be was an important part.
*One key thing to keep in mind, is that you are trying to create mirror images - in that the left and right sides of the butterfly should mirror each other. So unless you have stamps that mirror each other, you have to choose images that will work on both sides. If you look closely at my project, you'll see that the sides are not mirroring each other, but I made choices that were as close as possible. I also stopped what I was doing frequently, to look at my work, making sure that I was keeping it balanced on each side.
I'm not going to go into great detail about my project, as I realize that it's pretty involved, and not for everyone. But the process itself is an easy concept. As per my practise piece above, you can see that I sketched out a butterfly shape, then chose the larger blooms that fit. Then I just used the Daisy Bunch from Flower Set - 4052 in orange, and the tiny leafy sprig from 5009 - WC Mini flower Set in lime green to fill in around them all.
I created a wash of #249/565 to dab onto the background, and then I made the body using the rose trio from 5258 - Flower Set 4, and the foxglove from Flower Set - 4052 all in #565. I knew it was meant to be when I spotted the two flower stamps from the My Hope set that were perfect for the antennae. The colour palette that I used is: 403/565/126/346/933/993, and the finished card size is 6 1/2" x 5".
Thursday, August 1, 2024
Arched Poinsettia
I have another card with Spellbinders Poinsettia Spray die set today - and this time I've mounted my spray onto a white panel cut with their Essential Arches dies.
I scoured my Pinterest boards looking for colour combo inspiration, and I found several ideas using navy with blush pinks and a hint of burgundy. I used some two-toned pink cardstock from my stash, and die cut the poinsettias before ink blending some Tattered Rose ink on their centers, then gave them navy middles with gems attached. The branch is the same navy as the background, and two tones of pale blue holly leaves are glued on to it. I matted the arch on some dark silver glitter cardstock, and used the same paper to add glittery centers to the white flowers. A simple sentiment was stamped on the bottom corner.You can find this card at the Papercrafter's Workshop if you want to view it in person!








%20(1).jpg)
%20(1).jpg)
.jpg)
