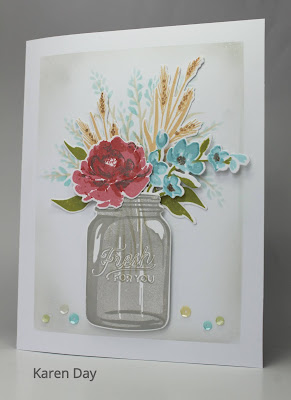
My niece Allie is my crafting partner-in-crime. Sadly, we live on opposite sides of the country... but we still manage to share supplies, enjoy inspiration on the internet and on each other's blogs. We have a mutual love of all things from "The Greetery", so it was only fitting that I reached for those supplies when I made her birthday card:
When I visited with her last summer, she gifted me with the Just Mason Around stamp set & die, which started my Greetery collection. While together, I stamped off a bunch of flowers using her Fleur Impressions set (the blue & pink flowers). And finally, I placed my own order this fall where I got the Budding Beauties Autumn set (the wheat) along with the stencil you see in the background.
I've used Distress Oxide inks for both the stamping and stencilling, and then pulled out my Pumice Stone ink and blending it lightly to create the background frame.
I adhered the jar & flowers with pop dots for some added dimesion, and there are highlites on all of the pieces from my Wink of Stella pen. A few sequins, and we're done. Happy Birthday, Allie!
Friday, January 31, 2020
Thursday, January 30, 2020
A Vintage Shoe for Watercolor Weekend
Art Impressions came out with this wonderful shoe stamp set in their watercolor line last summer, and this is the first time that I've put it to use! I've paired one of the vintage shoes with a teapot, and went very girly with the colours that I chose. Here's what you'll see on the Ai blog this Saturday:
Today I'm using the 5194 - WC Shoe Set, along with 5123 - WC Decorative Jar Set. I coloured my shoe with my Tombow Dual Brush Marker #565 Deep Blue, and went over it with #N57 Warm Grey 5. I stamped it on my Canson XL Watercolor paper, and then pulled out the colour with with a damp #4 paintbrush. I concentrated the colour in the areas where the shadows are strongest - under the arch, the heel and under the rolled top edge.
I've used two of the flower images from 4761 - Watering Can, starting off by colouring just the bloom of the hydrangea-like image with #533 Peacock Blue, and stamping it multiple times. After cleaning, I stamped it several more times coloured with #991 Light Ochre. Using the multi-bloom image, I coloured the flowers with #772 Blush, and the stem in #312 Holly Green. With the tiny foliage stamp from 5009 - WC Mini Flower Set, I stamped it repeatedly in #312, filling in spaces, and allowing the greenery to spill out the sides. After dabbing the flowers with my damp brush, I went in directly with the fine point of my #312 marker, darkening some areas, drawing in leaves on the tall flowers, and adding dots around the bouquet. I did the same with the other markers, adding shading to all of the blooms.
After masking off the shoe & flowers, I used my #4774 stamp positioner to stamp the teapot slightly higher, so that it would appear to be tucked in behind the shoe, colouring it in #565 and #N57 again. I pulled out the colour with my damp brush, concentrating the colour close to the shoe where it would be in shadow, and on the undersides of the teapot, keeping in mind that it is quite curved, so I wanted to leave some white area. After scribbling some #565 onto my palette, I picked it up with a wet brush and painted in the suggestion of a background, and a few sideways strokes to indicate the surface they're sitting on. I also added the blue to the shaded areas of the shoe and teapot to deepen the shadows. I added just a touch of the blush colour to the background and teapot to look like reflections. The Decorative Jar set includes 3 small images that you can use to embellish the containers, so I stamped a swirly one onto the teapot using #533. To finish things off, I used the 5062 Rounded Rectangle A2 Double Stitched dies to cut out my scene, then matted it with a periwinkle blue cardstock and used 3D Pop dots to adhere it to my background. I tied some pink organdy ribbon under the image and tied it in a bow, and added a few tiny pearls.
Sunday, January 26, 2020
For My Stud Puffin
Yup. Had to buy this one. Lawn Fawn comes out with the cutest stamps... but the sentiment is what really got me! So here is what my hubby will be getting on Feb.14th:
I kept it pretty simple, using some Dots & Stripes paper from Echo Park, and matting my image with an orangey-yellow that matches their feet. The puffins are coloured with Copic markers. The image and sentiment were die cut with stitched square and rectangle dies, and matted with black. I added a few red die cut hearts.
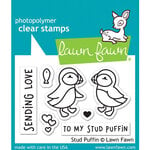
Lawn Fawn - Clear Photopolymer Stamps - Stud Puffin
from: Scrapbook.com
I kept it pretty simple, using some Dots & Stripes paper from Echo Park, and matting my image with an orangey-yellow that matches their feet. The puffins are coloured with Copic markers. The image and sentiment were die cut with stitched square and rectangle dies, and matted with black. I added a few red die cut hearts.

Lawn Fawn - Clear Photopolymer Stamps - Stud Puffin
from: Scrapbook.com
Labels:
Copic Markers,
Echo Park,
Karen Day,
Lawn Fawn,
Stud Puffin,
Valentine
Thursday, January 23, 2020
Crazy Birds Valentines
Well, you may or may not know that I've always loved the Crazy Birds stamp set by Tim Holtz from a few years ago... I hadn't used it in a while, but have pulled it out several times recently to make masculine birthday cards. Today I've made up a couple of masculine Valentine cards. I have a nephew whose birthday I missed around Christmas, so he's getting a valentine from his aunt instead!
After colouring with Copic markers, I fussy cut out the hearts (they are part of the Crazy Birds Accessories stamp set), used an x-acto knife to cut slits in the wings, and tucked the heart between them:
I used the fun polka dot papers from Echo Park, enamel dots and sentiments from Close To My Heart. Inside says simply "Happy Valentines Day".
Labels:
Copic Markers,
Crazy Birds,
Echo Park,
Karen Day,
Valentine
Thursday, January 16, 2020
Build My Life
I am trying something a little different for this edition of Art Impressions' Watercolour Weekend! I love the beautiful quotes & phrases in the Ai Bible Journaling collection - and their fabulous scripty fonts. I saw an idea similar to this on Pinterest, where it is less of a scene, but more of an artistic representation, that focuses on the quote.
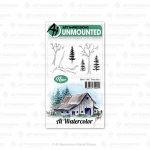
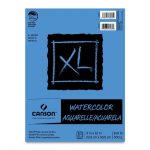
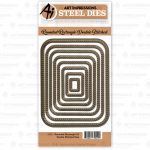
I started by die cutting my Canson XL Watercolour Paper with one of the 5062 - Rounded Rectangle Double Stitched Dies, and then I selected my colour palette of Tombow Dual Brush markers. I began by scribbling #991 Light Ochre onto my palette, and picked it up with a very wet #6 paintbrush, creating a background wash. I dropped in touches of #947 Burnt Sienna to add a little warmth. I took all three of the pine tree stamps from 5010 - WC Tree Set 1, and coloured them in varying shades of #098 Avocado, #177 Dark Jade and #249 Hunter Green, making some 2-toned. I stamped them to look like a forested hillside, doing second and third generation stamping to create some trees in the background.
Using a damp #1 paintbrush, I went over the tree boughs to blend the colours, and then pulled out the colour to pool below the trees, adding more colour where necessary to have the colours drip & blend together. I picked up a watery brush full of #493 Reflex Blue and dropped a few bits of colour around the scene where needed. I purposefully kept a lighter area in the center of my scene, and after my background was dry, I stamped the quote from 5127 - Build My Life Set using Versafine Onyx Black Ink. I spattered a little black paint around, and then using a black fine point marker, I drew in the birds in the upper left corner.
On my creamy cardstock base, I blended some Vintage Photo Distress Oxide ink , then mounted a piece of kraft cardstock cut 1/8" larger than my scene. I added 3D adhesive squares to my panel and adhered it to the card base. Here's a second version that I tried as a landscape orientation, and this became my husband's birthday card!
Be sure to check out the Art Impressions blog on Saturday to see what Tricia & Dot have created this week!


Friday, January 3, 2020
First Watercolour Weekend of 2020!
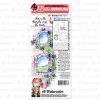
The Art Impressions Watercolour Guest Design Team are back this week to share projects using the #5229 - SBC Exclusive Hydrangeas Set that is available through Scrapbook.com. This is another stunning floral set by Bonnie - 3 large floral images, 3 small blooms and 6 great sentiments. Here's what I've come up with:
I started by putting some Bristol Smooth cardstock in my Misti, and put the largest image in as well. I started by colouring directly onto the leaves of the image with my Tombow Dual Brush Marker in #126 Light Olive, and did the veins and base of each leaf in #177 Dark Jade. After stamping it onto my cardstock, I was able to see any areas that I'd missed, or wanted to be darker, and (thanks to the Misti!) went over those areas again. Without removing the cardstock from the Misti, I used my damp #4 paintbrush to pull out the colour, filling the leaves in with the #126, and using the #177 for shadows.
Once the leaves dried, I used #533 Peacock Blue to colour all of the blossoms, and stamped it several times, again making sure all of the areas were covered. I picked up my paintbrush again to soften the lines and pull out the colour. I scribbled my #565 Deep Blue marker onto my palette, and picked it up with a wet #1 paintbrush - and I used this to add dots to the middle of each bloom - this helped to define each blossom. I also used the #565 to add shadows to areas where blooms were under leaves, or recessed behind others. The shadows really help to make the image less 2 dimensional, and more realistic looking.
I mixed a bunch of the colours that were on my palette with water and used it to paint a wash around the image, then splattered a little black paint on the whole image. After die cutting the image with the large rectangular die, I put it back in my Misti, picked one of the sentiments from the set, and stamped it in the top corner with Versafine Onyx Black Ink. I mounted it on a periwinkle blue piece of cardstock that shows through the cutouts on the die, and then onto a piece of black.
Click here to purchase the Hydrangea Set at Scrapbook.com!
Be sure to check out the Ai blog on Saturday, to see what Dot & Tricia have to share this week!


Subscribe to:
Comments (Atom)


