Tuesday, November 12, 2024

Shine Bright

 I have been struggling to get into Christmas cards this year... but seemed to break through my block by creating a bunch of bold rainbow themed Christmas projects today!  I was inspired by the Shine Bright stamp set from Pigment Craft Co., and knew that I had the Lawn Fawn Really Rainbow Christmas paper pack from a few years ago...


I used Festive Berries, Wild Honey, Mowed Lawn, Broken China and Shaded Lilac Distress Oxide inks, applied directly to my stamps with sponge dawbers and the help of my Misti.  I got an assembly line going and created panels for four cards.


I loved the look so much, that I die cut six tags with the Ai tag die, and stamped the same design.  My Glossy Accents was a little thick, but if I can get it flowing again, I may add it to the lights.


Before assembling my cards, I cut tag bases out of the coloured paper, and used the Snowflake and Quirky Owl Ephemera packs from Simply Stated Design (they're Canadian!) to put together four smaller tags.  I used my Lawn Fawn Tiny Christmas Tags for a small accent, and stamped them with holiday sayings.


Ten tags and four cards created today!  My stash is building...  *You can find Lawn Fawn, Distress Inks and Simply Stated Design products at the Papercrafter's Workshop


.  

Sunday, November 10, 2024

Christmas Sprigs

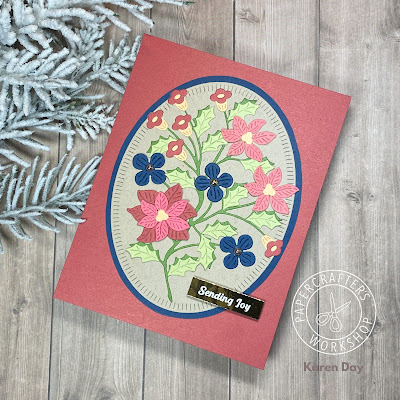
I have two more cards that I made to show off wax seals, using a bunch of different Spellbinders products.  The two die sets are Sealed Botanical Sprigs and Sealed Christmas Sprigs

I die cut all kinds of pieces from the die sets in holiday colours, and then arranged them into bouquets to show off my wax seals.  Several of the pieces were cut from the Spellbinders Gold Treasured cardstock, which is a lovely brushed gold.

I had to improvise with my wax seals, as I don't own any Christmas ones!  This leaf from Made of Honour worked well in a dark red wax with a gold paint accent.

I used some patterned papers from my stash, and added accents of brushed gold, and used decorative background dies.

I struggled a bit to figure out how to add a sentiment (without would've worked!), but since I wasn't adding twine or thread to the bundle, I just added a little stamped banner.

For this seal, I just used a blank stamp, then glued on a gold snowflake diecut.  You can get all your Spellbinders/wax seal needs from The Papercrafter's Workshop!


Friday, November 8, 2024

Warm & Wonderful

Squeaking in a last minute entry into the 2024 Coffee Lover's Blog Hop this afternoon!  I did an updated version of a card I made last year, using the lovely Warm & Wonderful stamp and die set from The Greetery.  I love it paired with the Winter Farmhouse papers from Simple Stories so put a couple of cards together today (the second one's not quite finished... we'll see if it gets posted).

More stamping than I've done in a while with this one!  But so worth it.  I used Distress Oxide inks with the help of my Misti to line everything up.

A few Champagne pearls from Pinkfresh Studio finished it off.
Thanks to Amy Tsurata for the fun event that she puts on - all the work is much appreciated!


Thursday, November 7, 2024

We Flamingo Together

Two more flamingo cards using Flamingo Together by Lawn Fawn.  This time I wanted to bling things up a little, so I used glitter paper to cut out the palm trees, and matted my oval background on some green glitter paper.  Really happy with these!  It'll be nice to have a few fun cards in my stash.

You can get all your Lawn Fawn products at the Papercrafter's Workshop!


Wednesday, November 6, 2024

Frosty Pumpkins

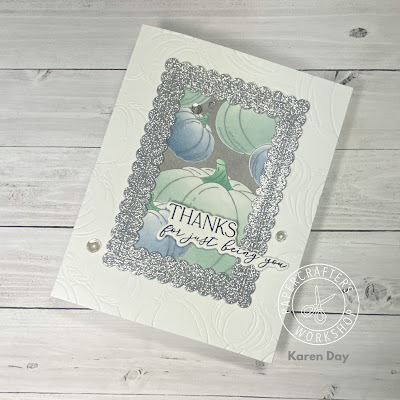
My last two cards with the September Betterpress Society plate "Raining Pumpkins" were created from an idea I had to have the center of a card be uninked - just the impression only.  Once I had my two panels made, it seemed like the perfect idea to make two cards, switching out the middles.


The uninked panel was simply a Porcelain Cotton Card panel run through my machine - I would do this again, it makes a beautiful background all on it's own.  A second Porcelain panel was created after inking the plate with Hickory Smoke Distress Oxide ink, giving the lovely grey background.  I used the coordinating stencils to ink the pumpkins in Faded Jeans and Iced Spruce, with Evergreen Bough for the stems.


I used the Scalloped Rectangle dies from Pinkfresh Studio cut in the Spellbinders Treasured Silver Glitter cardstock - cut twice, and layered with a frame of white for some extra dimension.  After cutting out the center of the panels using a rectangle die of a similar size, I adhered my panels onto card bases, switching out the middles, and adding the glitter frames.


The first card also got some vellum leaves tucked around the frame, and a pressed sentiment from the You Are Everything Betterpress Sentiment set.  Both cards got a sprinkle of silver sequins as well.


You can get a subscription to the Betterpress Society through the Papercrafter's Workshop.


Tuesday, November 5, 2024

You Flamingo Girl!

 I was able to purchase one of the Breast Cancer Fundraiser sets from the Papercrafter's Workshop in October - it's a sweet little stamp and die set called Flamingo Together.  Huge thanks to Lawn Fawn for donating the product - and if I'm not mistaken, $1300 was raised to donate.


I used the samples provided by the PCW staff as my inspiration - and pulled out some papers that had been in my stash for a while.  I paper pieced and inked the background, and after cutting it out with my Essential Arches dies from Spellbinders, I mounted it onto my background with 3D foam tape.  I added a little bling because... flamingos!!


Monday, November 4, 2024

Lots of Love Pumpkin card

My third card with the September Betterpress Society plate "Raining Pumpkins" from Spellbinders was designed as I went along.

I started by inking up the plate with Antique Linen ink, and Vintage Photo around the edges.  After pressing, I used the coordinating stencils to colour in the pumpkins with Dried Marigold, Antique Linen and Mowed Lawn.  I wasn't all that thrilled with the result, I thought the center area didn't have enough contrast.  While searching for something else, I came across this oval vellum diecut, and thought that it just might work on this card.


I die cut the Lots of Love sentiment from Pinkfresh Studio in brushed gold cardstock from the Spellbinders Treasured Gold cardstock pack, and mounted it on Chocolate cardstock  I was able to hide my adhesive behind the words, and attached the vellum to my panel.  A few gold pearls finished it off - I'm very happy with the end result!


You can get a subscription to the Betterpress Society through the Papercrafter's Workshop.

Sunday, November 3, 2024

SF Snowman and a Christmas Bouquet

  I am on the Art Impression blog today for the Watercolour Weekend post!


It's November, so I'm in full holiday card making mode... first, I have a Christmas bouquet to share:


I stamped the jug from the 5923 - Farmhouse Container Set in N55 on the smooth side of my Canson XL Watercolour Paper.  I like to create my bouquets from the bottom up, so I used the two pine boughs from 5830 - WC Mini Wreath Set in 249/565, and between them, stamped the round pinecone from 5472 - WC Christmas Wreath Set in 969.  Using my stamp positioner, I placed the smallest bloom from 5828 - WC Poinsettia Set coloured in 847/837.  The rounded leaf sprig from 5472 was added in 312, and the holly from 5829 - WC Holly Set and the berries from 5828 were both added in 177.  Finally, Bonnie's favourite twig from 4964 - WC Branches Set was tucked in on either side using 969.


After pulling out all the colour with a damp brush, I painted in each leaf, adding shadows with 565 where needed.  I painted layers of grey on the container, keeping the center area light or white, to be the highlight.  I added just the suggestion of a background with a wash of 565, and used it with N55 to provide a shadow behind the jug.  I added a few touches of gold to the berries and poinsettia centers with my gold gel pen.  I used the 5065 - Oval Double Stitched dies to cut out my image, and created my background using the 5962 - Classic Christmas paper pack.  The sentiment is from 5566 - Christmas Sentiments Set.

My second card is the wonderful 5818 - SF Snowman scene - these are so great, as with just one stamp, your entire image is just about stamped for you!   I stamped mine in N55 onto my Canson XL Watercolour paper, and pulled out the colour with a damp brush.  


After masking the house, I added my trees in using the evergreen from 5826 - WC Large Tree Set 2 in 249 - sometimes only colouring the top portion, to create a smaller tree.  I also added the spiky wreath from 5830 - WC Mini Wreath Set in 312/249 to the gate, and drew in a bow with my 856 marker.  I painted a wash of N55 on the house to be a pale grey shade, and drew in the siding with my pencil. N25 was used for the shutters, awning, dormers, lamps and his hat.  847 was painted on the door, his scarf and on the chimneys mixed with a little 969 to be more of a brick shade.  992 was painted on his coat, and 991 was added directly to the window panes with the marker.

565 was used to add in the sky, and to paint in the sidewalk.  I used it to add shading to the snowman, and under and around the tree branches and eaves.  After softening the trees with a damp brush, I used Bleedproof White paint to add snow to the branches, roof and around the sidewalk, as well as to add icicles to the roof and it was dotted to suggest falling snow.  A final touch was to add a little chunky glitter on some of the snowy surfaces.  Background paper is from 5962 - Classic Christmas, and the sentiment is from 5566 - Christmas Sentiments Set.

Friday, November 1, 2024

2024 Coffee Lover's Blog Hop

It's that time again!  I am participating in the 10th year of Coffee Lover's Blog Hops - and haven't missed one.  I'm using two of Art Impressions newly released stamp sets: Woodland Critters and Woodland Bears.

The images were coloured with Copic markers, and cut out with their matching dies.  I made a background using papers from the Winter Woodland paper pack (also Ai!), using my Essential Arches dies from Spellbinders, and the Birch Trees dies from Lawn Fawn.  A few of Ai's Large Snowflake Dies were added in matching colours.  The sentiment is from the Christmas Sentiments Set.

Enjoy the hop!


Raining Pumpkins

The September Betterpress Society plate from Spellbinders was called "Raining Pumpkins", and was this fun, full coverage plate of (you guessed it!) pumpkins, that are raining or floating.  I used it as a chance to create some fun ink blended backgrounds, so created two versions using the same colours:

For the first card, I used Distress Oxide inks (Ground Espresso/Aged Mahogany/Antique Linen/Crushed Olive/Peeled Paint) on a piece of Bisque Cotton Card, blending from the upper left corner, to the bottom right.  Then I spattered the panel with water to create the fun oxidization effect, and also spattered with some Ground Espresso ink.  The plate was inked up with Ground Espresso and pressed.

For the second card, I did the same blend, but this time did my ink blending on the press plate itself, then pressed it onto a piece of regular cream cardstock.  This left the pumpkins uncoloured, and created a lovely, colourful background.  The ink comes out a little more vibrant on the cardstock.  I used the coordinating stencil to ink in the stems using some Peeled Paint ink.

Both cards were mounted onto card bases, and a sentiment from the You Are Everything set of Press plates was added, and I die cut the same shapes out of glitter cardstock and mounted it behind them.  A few brown jewels added some extra glimmer.

You can get a subscription to the Betterpress Society through the Papercrafter's Workshop.