I have owned the Sweet Leaves Frame stencil & die set from Pinkfresh Studio for a while, and had stenciled up a panel, and never used it - until now! I still make valentines for my adult children, and decided this would be a pretty one for my daughter. I used the coordinating die to cut out the images, not realizing until I was assembling the card, that the frame actually has a right side up - I thought it was the same in either direction. You can see across the middle, where the die/stencil don't line up! Oh well, my daughter will still appreciate the colours and sparkle.
Saturday, February 14, 2026
Friday, February 13, 2026
A Quick Valentine
I needed to put together a last minute valentine for an elderly relative that I was visiting today, so I dove into my stash to see what I had on hand. I pulled out a couple of papers from Lawn Fawn's Let's Polka in the Meadow pack, and cut one into a large heart.
The flowers are all from Fleur Impressions by The Greetery, that I already had stamped and ready to use in my craft room, so I was able to decorate my card quickly, and finished it off with a gold 'love' die cut.
Thursday, February 5, 2026
Sending Hedgehugs!
Lawn Fawn just seems to be my go-to for Valentines... I pulled out the Hedgehugs stamp set, and found these little guys already coloured, waiting for me. Just a little fussy cutting, and then I created a little grassy hillside, and used the LF gold dot paper as my sky.
Monday, February 10, 2025
Waffle Valentines
I still love making valentines for my kids, even though they're grown... so I pulled out the Let's Toast and Waffle Lot stamp and die sets by Lawn Fawn for this year's versions.
Let's Toast comes with an add-on set that allows it to be interactive. There's a little slot in the toaster, and a simple mechanism behind it that creates the pull tab. I don't own the dies for the waffle set... so I stamped, coloured (with Copics) and fussy cut a whole bunch of the waffles and tiny berries.
The papers are all older Lawn Fawn, and I mounted everything on some kraft paper. The inside says "You are waffly cute!"
Tuesday, February 6, 2024
Galentines cards
I decided to make Galentines cards for a couple of girlfriends this year, and have been dying to use this little envelope die from Art Impressions. It's part of 5543 - Journal Template Die Set (one of a ton of dies that come in the set!), and I pulled out two of the Ai Paperpacks, mostly 5741 - Valentines Paper Pack, with a few sheets from 5835 - Mini Journal Paper Pack.
Happy Galentine's Day!
Tuesday, January 16, 2024
Lots of Love
I'm starting to assemble a few Valentines, once again using things I've got sitting in my stash. I stamped a bunch of these Oopsie Daisy flowers from The Greetery several years ago (!!), and am finally using up the last few. I've also pulled out a Greetery stencil to do some background ink blending with Worn Lipstick and Tattered Rose Distress Oxide inks, and finished them off with a diecut sentiment and jewels from Pinkfresh Studio.
Thursday, January 4, 2024
Valentines for Veterans
This is such a wonderful initiative by Veterans Affairs Canada - where you are encouraged to create handmade cards, and write a note inside to thank a veteran for their service - or simply wish them a Happy Valentine's Day. It's open to everyone, and children/schools are welcome to participate - just google "Valentines for Veterans" and it will lead you to the Gov't of Canada website with the address to send your cards. They need to be received by Feb 1st, in order to be distributed to the care homes on time. *Also - I believe there is an American version of this, so Google it if you're from the US!
Saturday, February 11, 2023
Simple Valentines
I haven't been posting much, but I have been creating! Bits and pieces, doing some stencilled backgrounds, prepping dies and doing some painting. I have had a chance to put together some valentines for my family, though:
This "love" CTMH die is the star of the show this year! I die cut a bunch of hearts, and created a few different backgrounds. The first is using a 3 layered die from Pigment Craft Co.This leafy background stencil is from The Greetery - my first effort using it! Can hardly wait to keep trying it in different colour combos.
And finally, I had leftover striped from the recent slimline that I made, so I layered them on a diecut banner, and stitched it down to my background. Happy Valentine's Day!
Thursday, January 19, 2023
Valentine Mailbox
For the next Watercolour Weekend post on the Art Impressions blog, I'm doing a simple scene to show you how to make a Valentine by using the stamps you have.
I stamped the mailbox image from 5575 - Mailbox Birdhouse Set in Tombow #969/565 onto my Canson XL Watercolour Paper. And used the same markers to add the bird from 5561 - Birds and Bugs Set. I wanted to create a bunch of hearts spilling out of the mailbox, so with a pencil, I sketched the hearts, making them smaller as the floated away. I also drew one tilted sideways in the bird's beak. I used three of the blooms in 5008 - WC Flower set 3 coloured in #856/177 and stamped my flowers around the base of the wood stand.
After pulling out all of the colour with a damp brush, I used #761/856 to paint the hearts, keeping a lighter highlite area. #993 was added to the flag, and shades of #969 were painted in streaks to suggest woodgrain on the base of the mailbox. The sweet bird was painted with shades of #528, with a little #565 on the wing tips and as shadows. With the two grasses in 5476 - WC Foliage Set 5, I added them under the flowers in #177/126, and blended them with my damp paintbrush. I just lightly touched each bloom with my paintbrush to enliven the colour a little, but not enough to lose the definition of the petals. A wash of #565 was added to the sky. I hope you'll pull out some of your regular stamp sets and make them into something sweet for Valentine's Day!
Be sure to check out the Ai blog this Saturday, to see what Tricia & Diane have to share.
Sunday, January 8, 2023
Valentines for Veterans
I am happy to have been able to put together 30 cards for an initiative that the library I work at is supporting this week. Valentines for Veterans is a program that the government supports to have homemade valentine cards given to veterans in long term care homes. We will be putting out craft supplies at the library, so families can create the cards, and write a brief note inside thanking them for their service. I kept the designs bright and bold, and made multiples of each:
Sunday, February 13, 2022
Hot Chocolate Bombs!
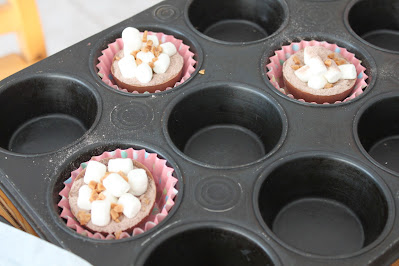
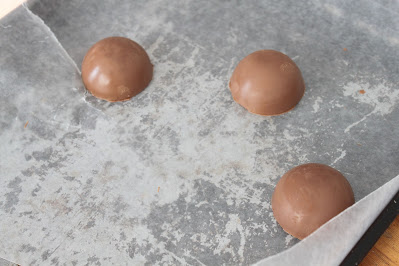
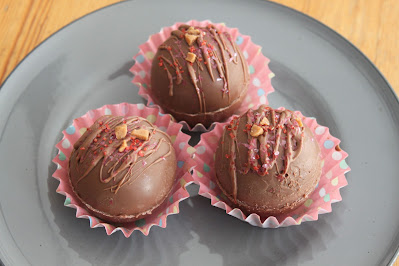
Well this was hilarious, fun and very messy! Hot chocolate bombs became all the rage about a year ago... so when we saw a kit with the molds on sale for $8, my daughter & I thought, why not? So we learned a few things. Those Youtube videos that look effortless when people put them together aren't exactly the reality! But definitely listen to what they say regarding ingredients and how to temper chocolate. We didn't want to buy expensive chocolate to start, so grabbed what we could find to give it a try. I would definitely not use milk chocolate next time! Even though it contained cocoa butter, as they said - it was melting as soon as we touched the chilled cups, so I think that dark chocolate would be the way to go. Here's what our efforts produced:
We put the empty 1/2 shells into muffin cups, and in a muffin tin to support them while we filled them with hot chocolate powder, mini marshmallows and skor chips.We took the top shells, held them with paper towel (this stopped them melting from the warmth of our fingers), spread a thin layer of melted chocolate around the rim, and added them to the filled cups.
Saturday, February 5, 2022
Valentine Hedgehogs
I made a couple of sweet "Galentines" today for a couple of friends. These little Hedgehogs from Lawn Fawn are favourites of mine!
I used six Distress Oxide inks and blending brushes with the Garden Peony Blossoms stencil from Memory Box to create my pastel background, and inlaid the heart die into the background.Friday, January 28, 2022
Valentines for 2022
Well here it is still January, and I've managed to get my valentines made already? They're not over the top, we keep Valentine's Day fairly simple in our family, but it was fun to pull out supplies that I've had for a while, and make good use of them. I also love making valentines that are a little non-traditional, especially when it comes to cards for the males in my life. I pulled out the You're My Happy papers by Teresa Collins, and a few CTMH dies to put these together:
I used CTMH glitter paper on my cards - a coppery/brown colour for the masculine cards, and a nice glittery gold for my daughter.Tuesday, February 9, 2021
The Last Valentine
Well here I am with 5 days to go... and I'm finished my Valentines??! If only I could finish all of my Christmas cards early and ahead of schedule! I saw this idea by Michelle on the MFT Instagram page, and recreated it with a couple of CTMH dies that I had in my craft room:
I used a heart die to create my own stencil, then from the bottom up, used Cracked Pistachio, Mermaid Lagoon, Peacock Feathers and Faded Jeans with blending brushes to fill it in. I sprinkled it with a bit of water, then some indigo ink.I taped down both the stitched rectangle die and the love word die, and ran them both through my Cuttlebug. I cut love out 3 more times in white cardstock that I stacked underneath the original to give it a bit of height. I matted it all on a piece of teal green cardstock and mounted it onto my white card base.
Friday, February 5, 2021
Valentines
Getting some Valentines made for my children. I usually do cute & fun ones for them, but this year I went more classy & dreamy! I was inspired by the sketch on the Fusion Card Challenge blog (so happy to be playing along - it's been a while!).
Here was our inspiration:
Thursday, February 4, 2021
A Watercolour Valentine
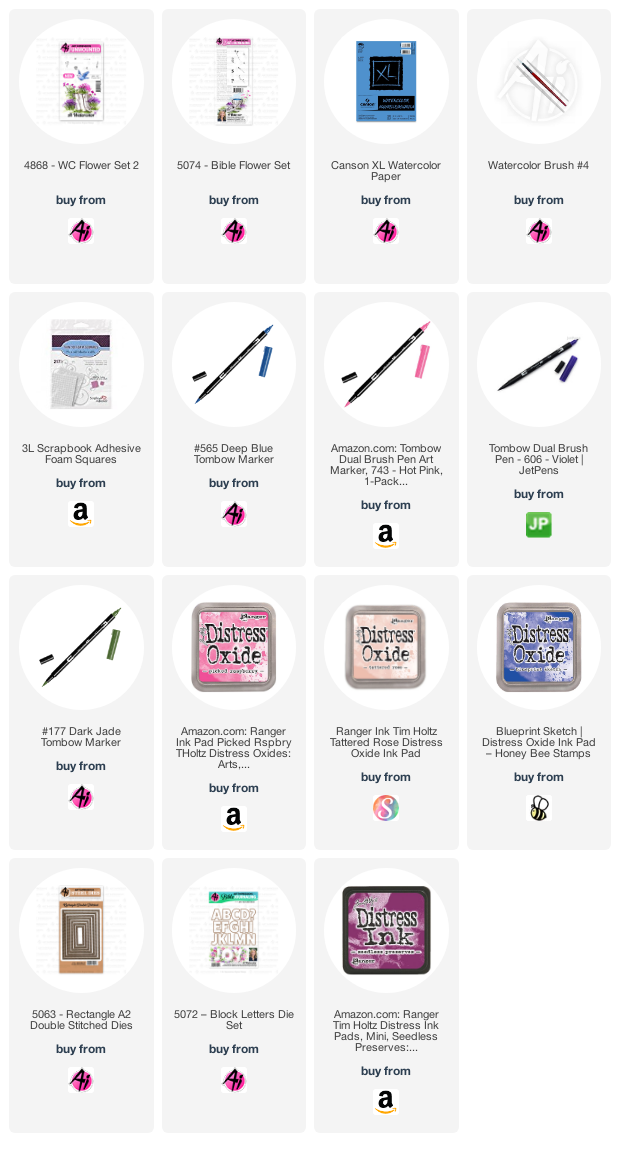
For the upcoming Watercolour Weekend on the Art Impressions blog, I'm sharing a quick Valentine idea using the wonderful 5072 Block Letters Die Set and a little watercolor wreath to spell out "I (heart) you"!
I actually started out by creating my ink blended background panel, which established my colour palette - Distress Oxide Ink colours are listed below!
I chose similar colours of Tombow Dual Brush Markers, and started making my focal panel by sketching a heart shape on my Canson XL Watercolor paper. I stamped little clusters of flowers and greenery using the following: From 5074 - Bible Flower Set, the Daisy cluster in #606 Violet; the tiny dot flowers in #565 Deep Blue; and the Tiny greenery in #177 Dark Jade and from 4868 - WC Flower Set 2, I used the little heart flowers in #743 Hot Pink. I touched everything with a damp brush - but kept the images fairly intact without spreading the ink around. I lined up the I and U from the die set, and ran it through my machine to cut out the letters.
I took both of my panels and cut them out with the 5063 - A2 Rectangle Double Stitched Dies which finished the edges nicely. Both panels were mounted onto a matte silver cardstock, and I had to cut the middle of it out under the letters to have the background show through. I tied some blue organdy ribbon around my base, and added a bow before adhering my image down with 3D adhesive tape. A few sequins finished it off.
Sunday, January 26, 2020
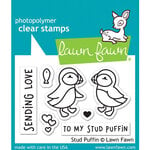
For My Stud Puffin
I kept it pretty simple, using some Dots & Stripes paper from Echo Park, and matting my image with an orangey-yellow that matches their feet. The puffins are coloured with Copic markers. The image and sentiment were die cut with stitched square and rectangle dies, and matted with black. I added a few red die cut hearts.

Lawn Fawn - Clear Photopolymer Stamps - Stud Puffin
from: Scrapbook.com
.jpg)
.jpg)
.jpg)


.jpg)
.jpg)
.jpg)
.jpg)
.jpg)
.jpg)
.jpg)
.jpg)

%20(1).jpg)