Saturday, July 8, 2023

The Last Pies

 For now.  I have a feeling these will reappear this fall, when pumpkin pie season approaches.  This is the last trio of cards I made with the Spellbinder's Perfect Pies collection by Tina Smith.  Once again, I pulled out my October Afternoon papers to create this set that has a bit of a country fair feel.


Thursday, July 6, 2023

Happy Birthday Queen B!!

 Our sneaky Art Impressions Design Team Coordinator has launched a challenge for all of the Ai fans to make a card for Bonnie's birthday, which just happens to be on July 10th.  Bonnie is affectionately called our "Queen B", and I've had this Bee die for a little while, so knew that I'd be using it on her card:

The leafy stencil die and bee are from The Greetery, and the font dies are Art Impressions.

If you'd like to join us in making her a card, you can find the challenge post on the Ai blog.  

Happy Birthday, Bonnie!  


Wednesday, July 5, 2023

And More Pies.

 My pie card obsession continues!  I made a whole bunch of these over the past couple of months, and have finally got them completed and photographed.  These are all created with the Spellbinder's Perfect Pies collection by Tina Smith.

October Afternoon papers are some of my all-time favourites, even though the company is long gone, so I pulled them out to create these, along with some Pinkfresh Studio dies.


Enjoy your pie :) 

Thursday, June 29, 2023

Living Water

I've done a little masking today to put my scene together for the upcoming Watercolour Weekend post on the Art Impressions blog.

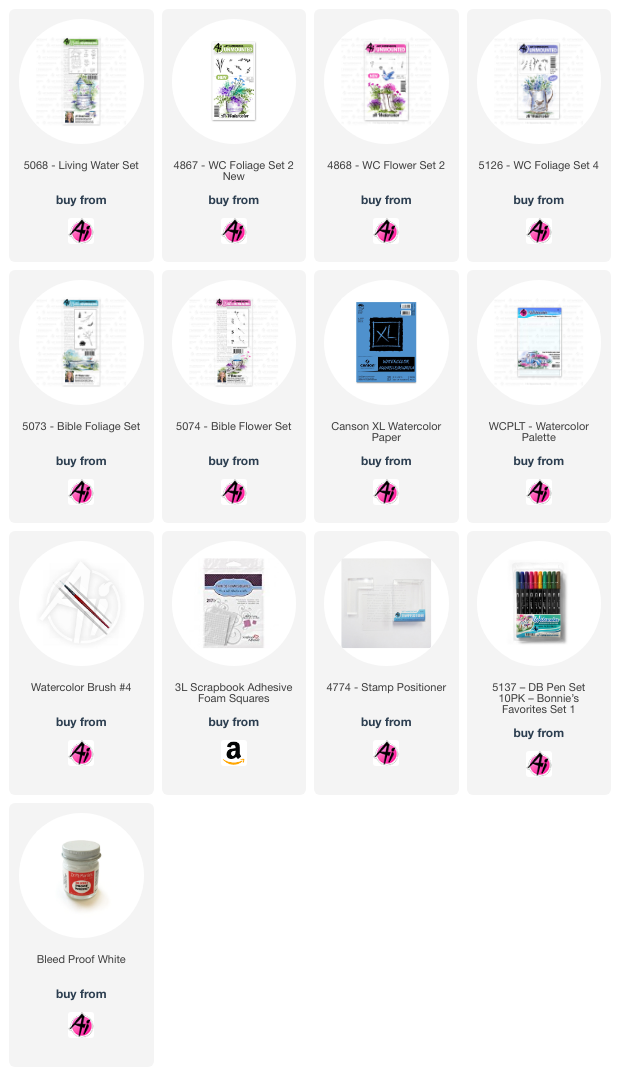
Using 5068 - Living Water Set, I positioned the bucket along with the geese from 4207 - Feather Friends on the same block, and stamped them onto my Canson XL Watercolour Paper using Tombows #969/565.  After masking them both, I used my stamp positioner to place the wishing well just behind them.  I pulled the colour out of the lines with a damp brush, using it to create the greys of the stones and rocks, and shadowing the wood and geese.  I used the Daisy Bunch from 5074 - Bible Flower Set and #565 as the flowers in the bucket, then stamped my greenery from 5126 - WC Foliage Set 4 on either side of the well in #126.  Tones of #992/977/969 were used for the bucket and wooden posts, to create an aged, weathered wood look, and #407 was painted on the roof and spindle.  With the medium sprig from 4867 - WC Foliage Set 2 New, and #177, the vine was stamped to be winding up the well onto the roof, and after dampening it with water, I went in a second time to add some darker branches.  The heart circle from 4868 - WC Flower Set 2 was stamped in clusters using #993 to add in the yellow flowers.  I used my #905 and 933 markers directly on the paper to colour in the beaks and feet of the geese.  *To make sure that the geese didn't fade into the background, I made sure that there was enough greenery behind them to give contrast to their white bodies. 

The small grass from 5073 - Bible Foliage Set was stamped repeatedly in #126 to add touches of grass around the scene, and a wash of the green extended the look of grass on the ground.  To finish up, I used Bleed Proof White ink to add white centers to my blue flowers, used #565 to add shadows on the well, the rock and around the geese - and finally, used my blue Twintone marker to add a few dots, and darken up some of the lines.  A wash of # 493 was painted in as the sky.

Friday, June 23, 2023

Happy Pride!

 It's Pride Weekend here in Toronto, so I've made a couple of fun rainbow cards to give out to friends.

I love this method of adding strips of paper to create whatever kind of rainbow you want!  After die cutting the heart from the first one, I loved the negative so much that I used it on the second card.  Have a love-filled weekend, everyone. 


Friday, June 16, 2023

Handcart Scene

 For this weekend's Watercolour Weekend post on the Art Impressions blog, I'm using several sets for the first time, that were released a little while ago.  I wanted to create a scene where the sweet little gal is selling flowers, so this is what I came up with:

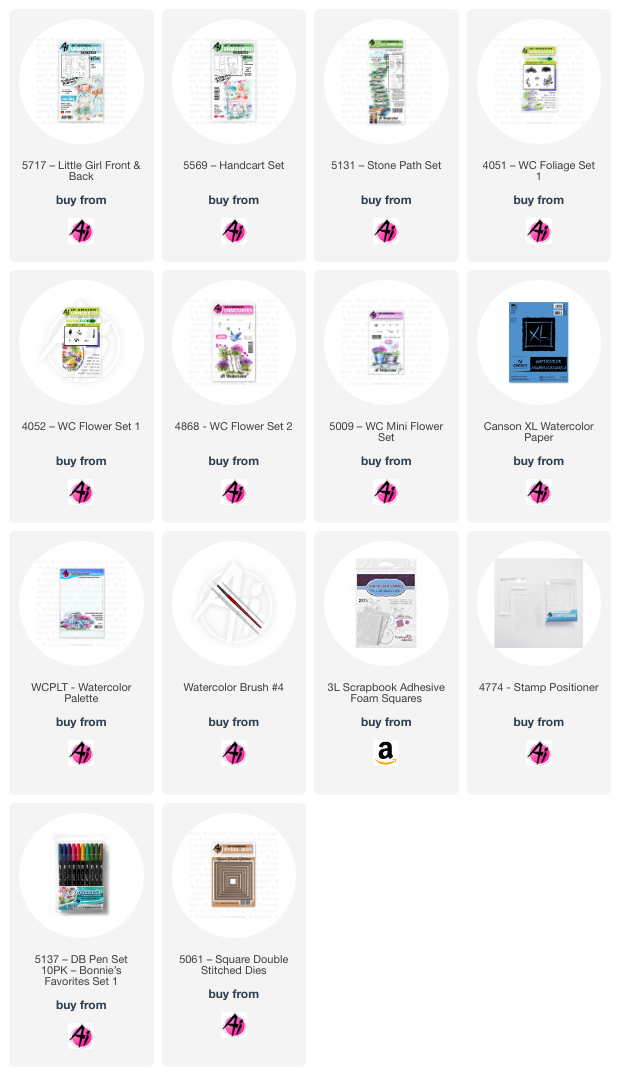
I started by stamping the 5569 - Handcart Set onto my Canson XL Watercolour paper with Tombow #969/565, and separately stamped 5717 - Little Girl FB.  After pulling the colour out from the lines, I picked a warm summer palette of colours, and started adding my flowers & foliage.  Using the Daisy bunch from 4052 - Flower Set, I added them in #925 and #407.  With the smallest image from 4868 - WC Flower Set 2 and #725, and the tall stems from 4052 in #565, I filled in all the flowers.  The tiny sprig image from 5009 - WC Mini Flower Set was stamped in both #126 and #312 as the foliage in both the cart and her basket.  Tones of browns #969/947/992 were painted on the cart trim & wheels, her basket, hat and shoes.  I wanted to add a sign to my scene, so I used the signpost from 5131 - Stone Path Set, altering it a little, and painting it in the same brown tones.  I used my Twintone Chocolate marker to write on the sign, and then cut it out.

N65 was painted onto the watering can, and as the white shadows on the cart, and #947 created the look of a terracotta pot.  The yellow of her dress and the banner on the cart are shades of #991, with some #992 shadows, and her skirt is #407.  I used the tiny grass from 4051 - Foliage set in #126 to add grass around the cart and sign, painting it out as a wash, and added a wash of #493 as the sky.

The background was cut out with 5061 Square Double Stitched Dies.  I cut the Little Girl out with her matching die, and fussy cut out my sign.  I attached them both to my base painting with foam adhesive, to make them both appear as if they are in the foreground.  Be sure to check out the Ai blog on Saturday to see what Diane & Tricia have created!
Tuesday, June 6, 2023

More Perfect Pies

 These aren't the kind of cards that you just make one of!  I think I have 14 pie cards in various stages of completion on my craft desk - so you'll be seeing a lot more of them over the next while :-)

This is the Perfect Pies collection by Tina Smith from Spellbinders.  I had cut all of the pie and decor bits when I previously used these sets - it just makes sense to cut and ink blend a whole bunch at the same time, when you have all of the papers out and ready to go.
I'm using up pieces of October Afternoon papers that I've been saving for a long while.  After assembly, a little chunky glitter gave the pastry that sugared-up look.
This should make a nice little gift set.


LinkWithin

Related Posts with Thumbnails